I love rustic home décor elements and have wanted a Birch bark covered flowerpot for ages. But when I first tried pot decoration with bark I could not get it to work the way I wanted. I spent a couple of very frustrating hours trying to stick wet springy bark to pots, using a variety of glues with no success.
It was hubby who suggested ‘why don’t you just mold the bark around the pot, and leave it to dry in that shape before you try and stick it’. I think I probably looked like a goldfish for a moment while I digested his comment. It is, in fact, really obvious once someone points it out. This method for decorating flowerpots in bark works like a dream.
There are a few fallen Birch in the woods where we walk our dog, so I had been thinking using birch bark in crafts for a while. With my new found knowledge of working with Birch bark I would suggest that if you do pick some up, that you immediately roll it with the outer face of the bark on the outside and secure it. Bark will naturally curl the other way if left to its own devices as it dries, making it much harder to work with.
How to Make Rustic Birch Bark Covered Flowerpots
What you will need to decorate flower pots in Birch bark.
- Pieces of bark
- A terracotta pot
- Elastic bands and PVA glue
We also painted the rim of our pot with a cream acrylic paint.
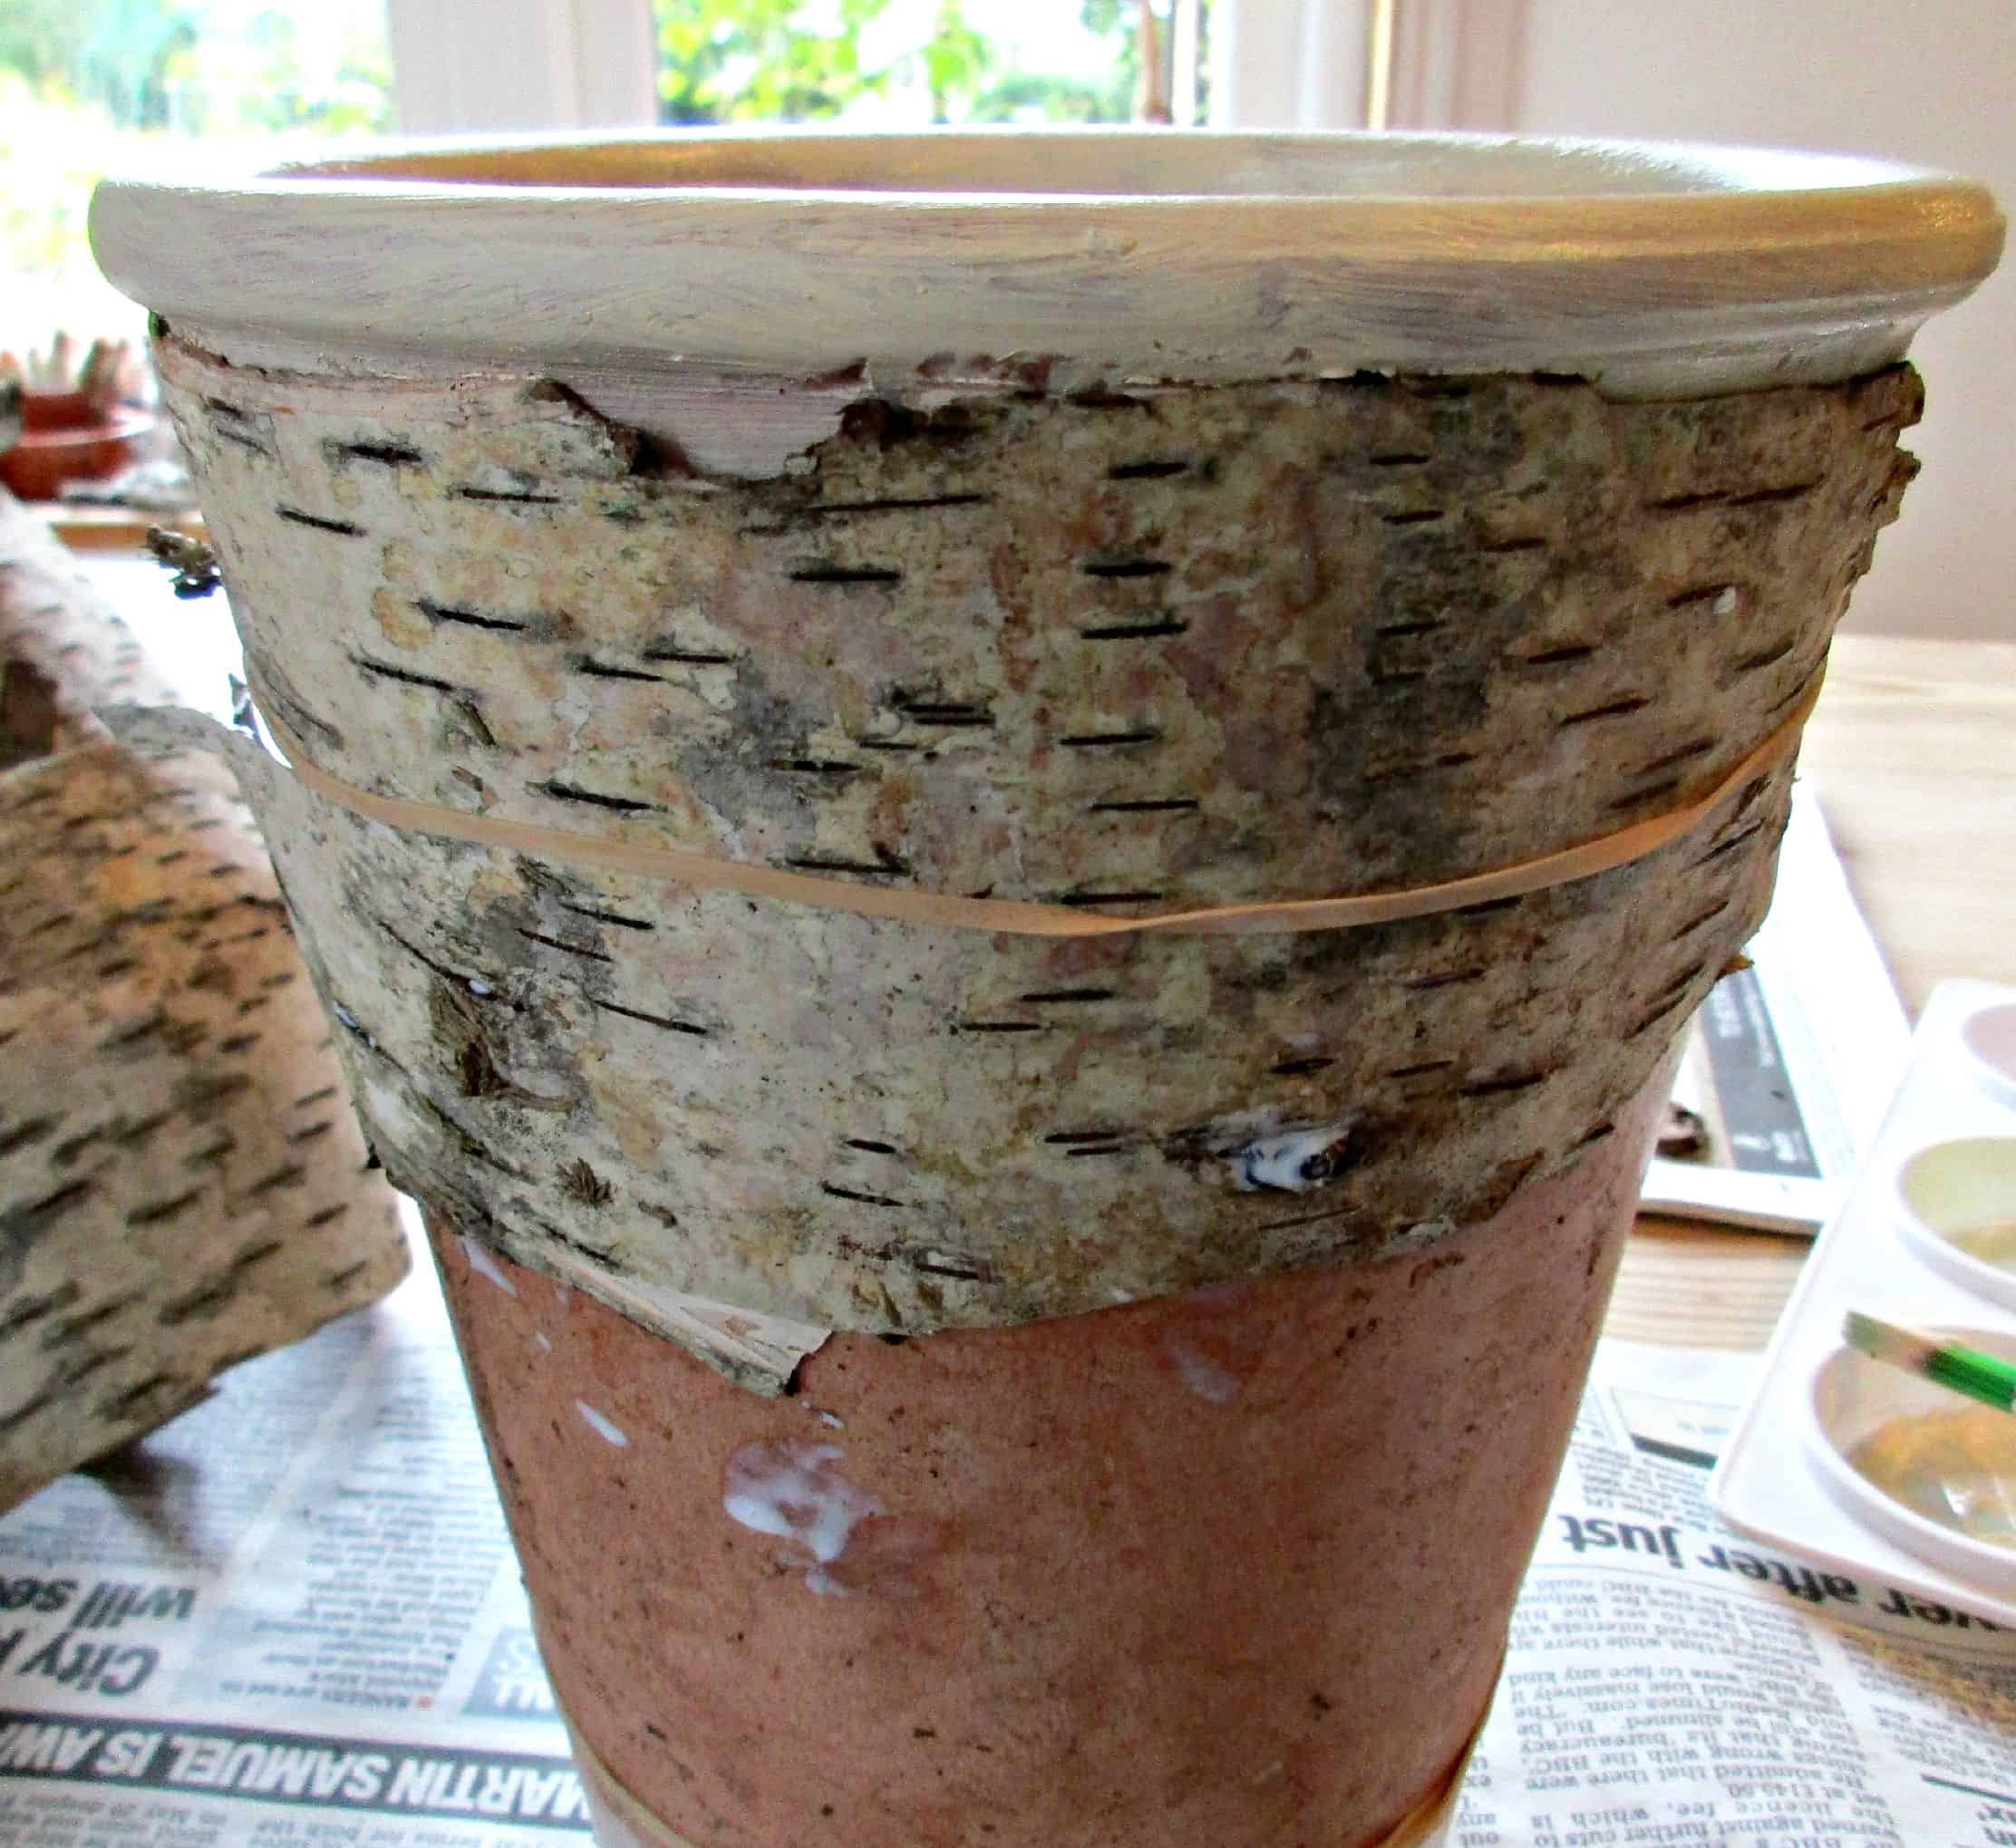
Our birch bark had dried out by the time we came to use it so we soaked it in water for half an hour. Begin by scraping off any lumps on the inside of the bark. Then wrap the bark around the pot, roughly trimming away any excess and leave to dry for 24hrs. We used sticks to stop the elastic bands from damaging the edges of the bark as it has a tendency to split along them.
Once the bark pieces has dried into the shape of the pot, remove them. Prime the pot with a watered down coat of PVA glue and leave it to dry. We painted the rim and the base of our pot in cream. This will help disguise any uneven edges of bark once the pot is finished. I would advise allowing the paint to dry properly. I didn’t, and ended up with finger prints on ours!
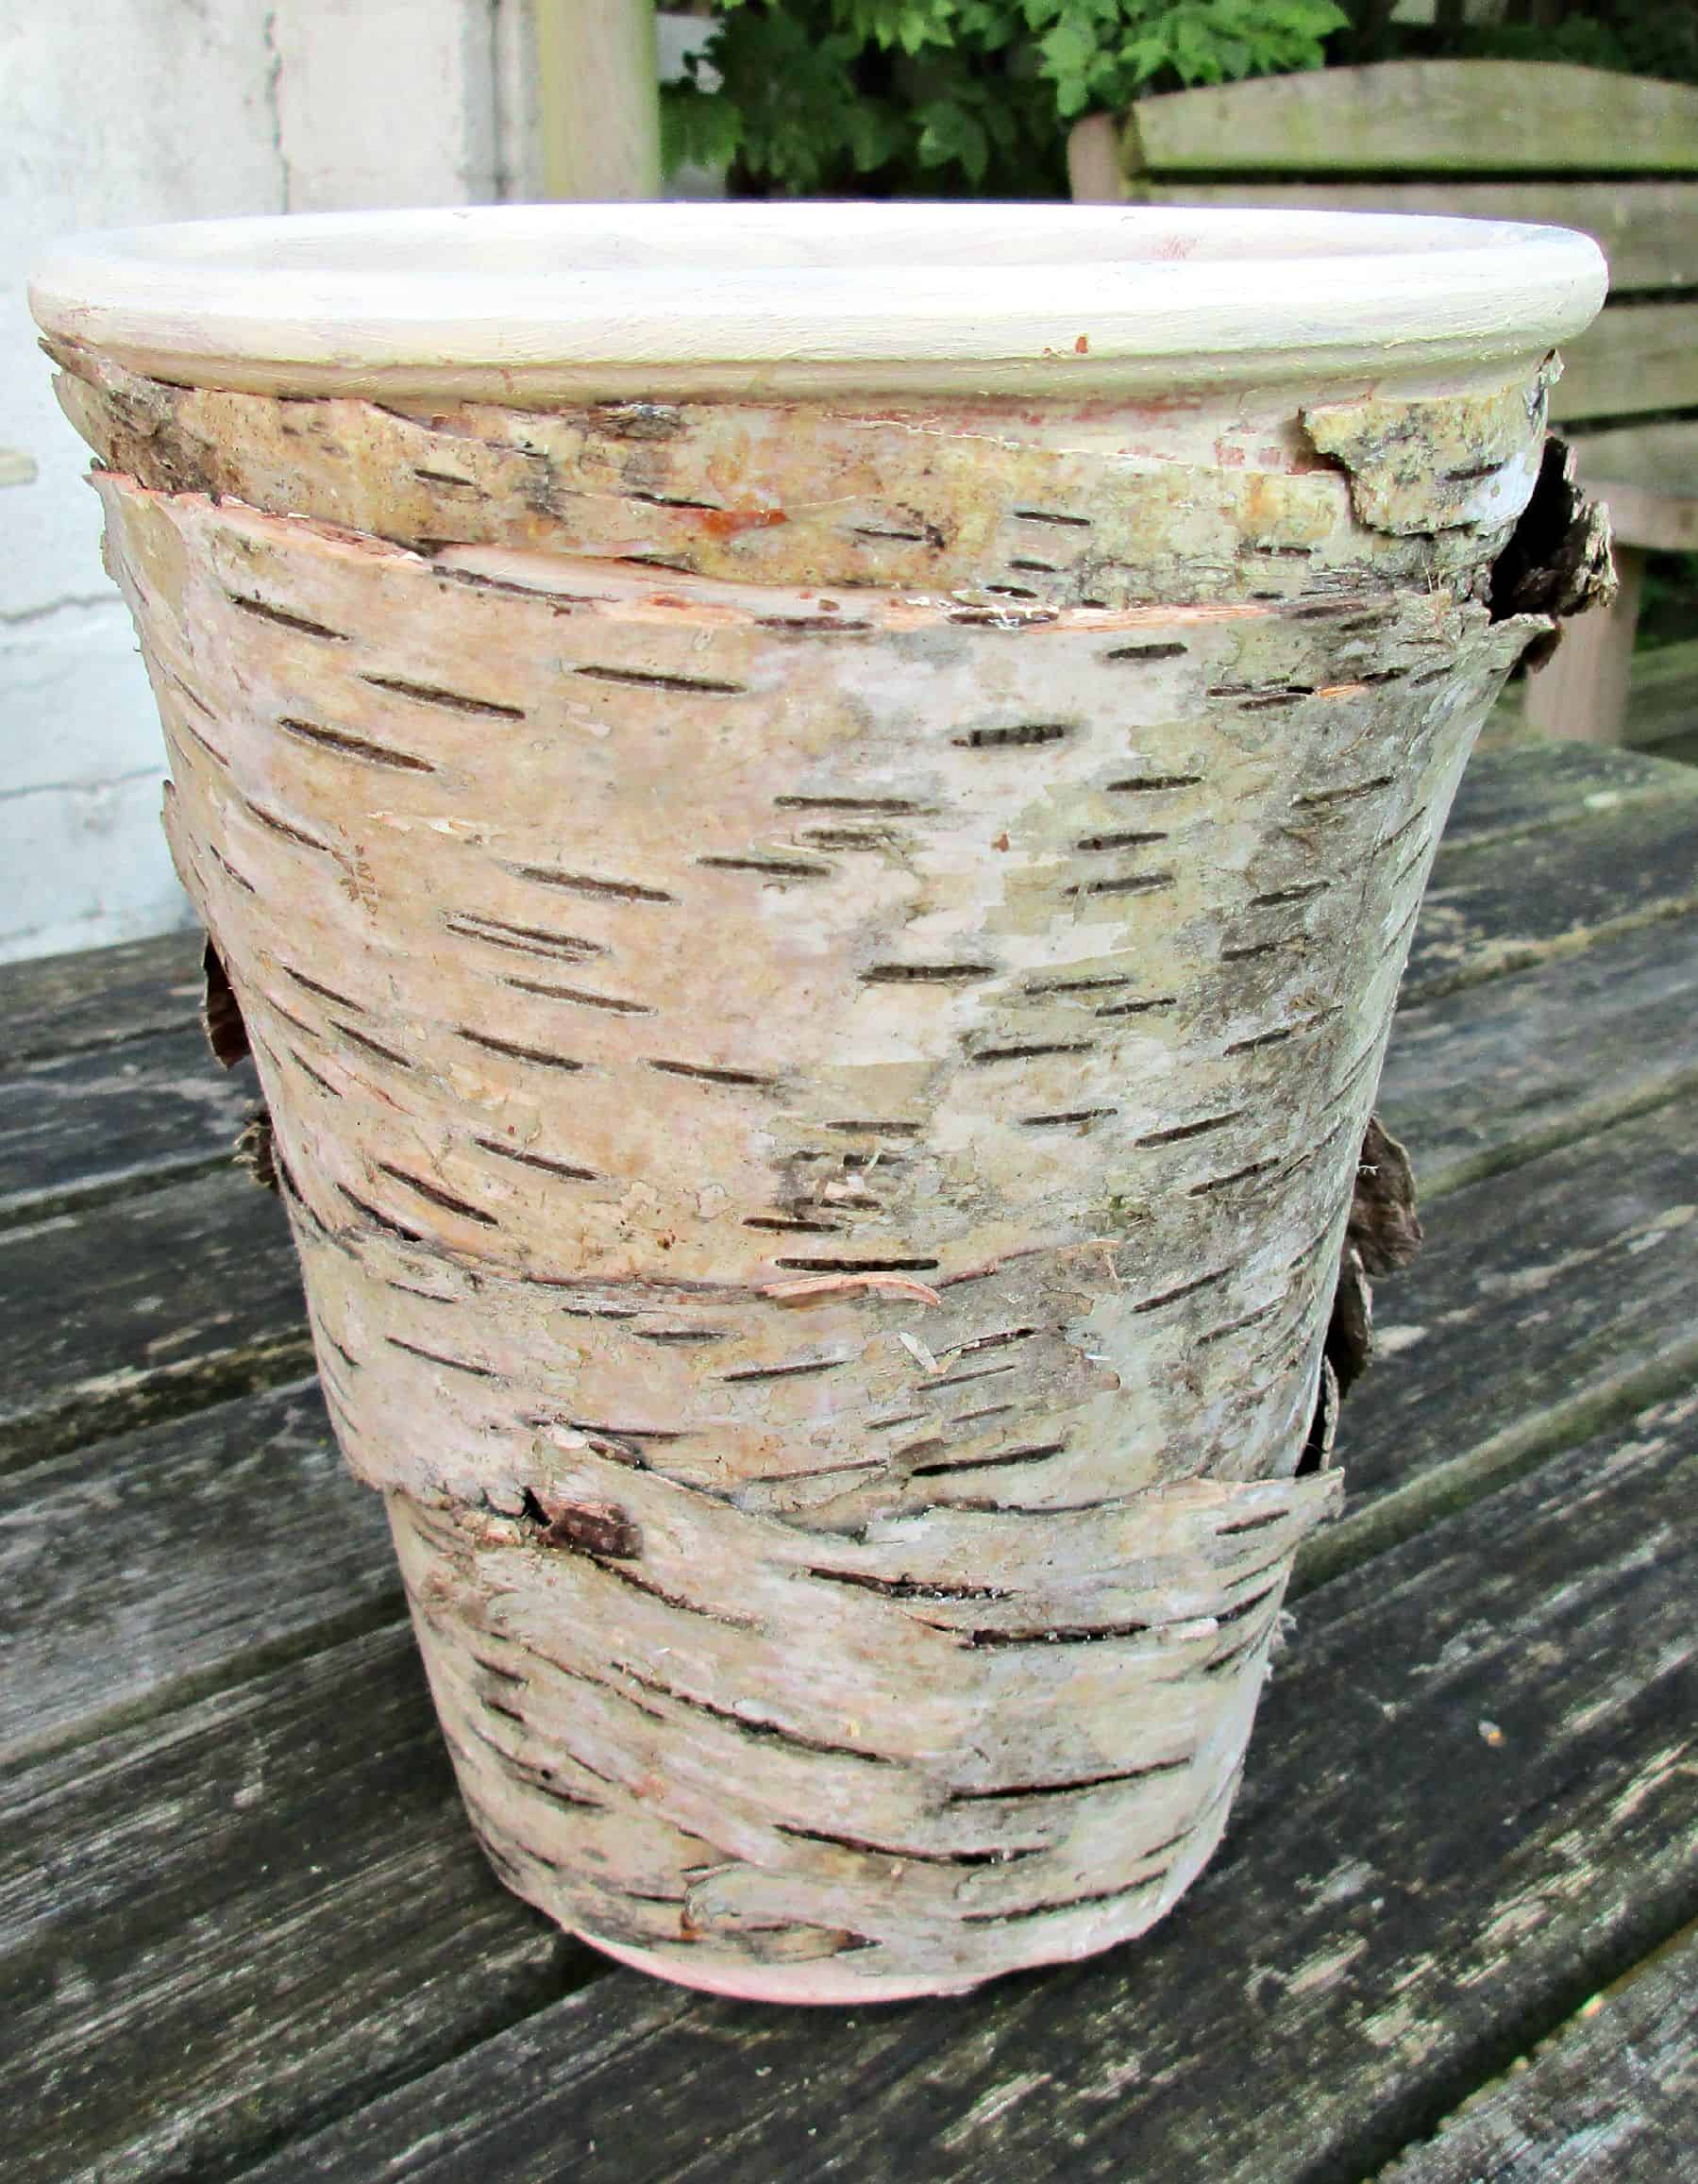
Apply a generous coat of PVA glue to the inside of your bark, and wrap it around your pot. Use the elastic bands to keep it in place as you go. We left our pot for a full 24hrs to dry once the birch bark was glued into place, and it is held on really securely.
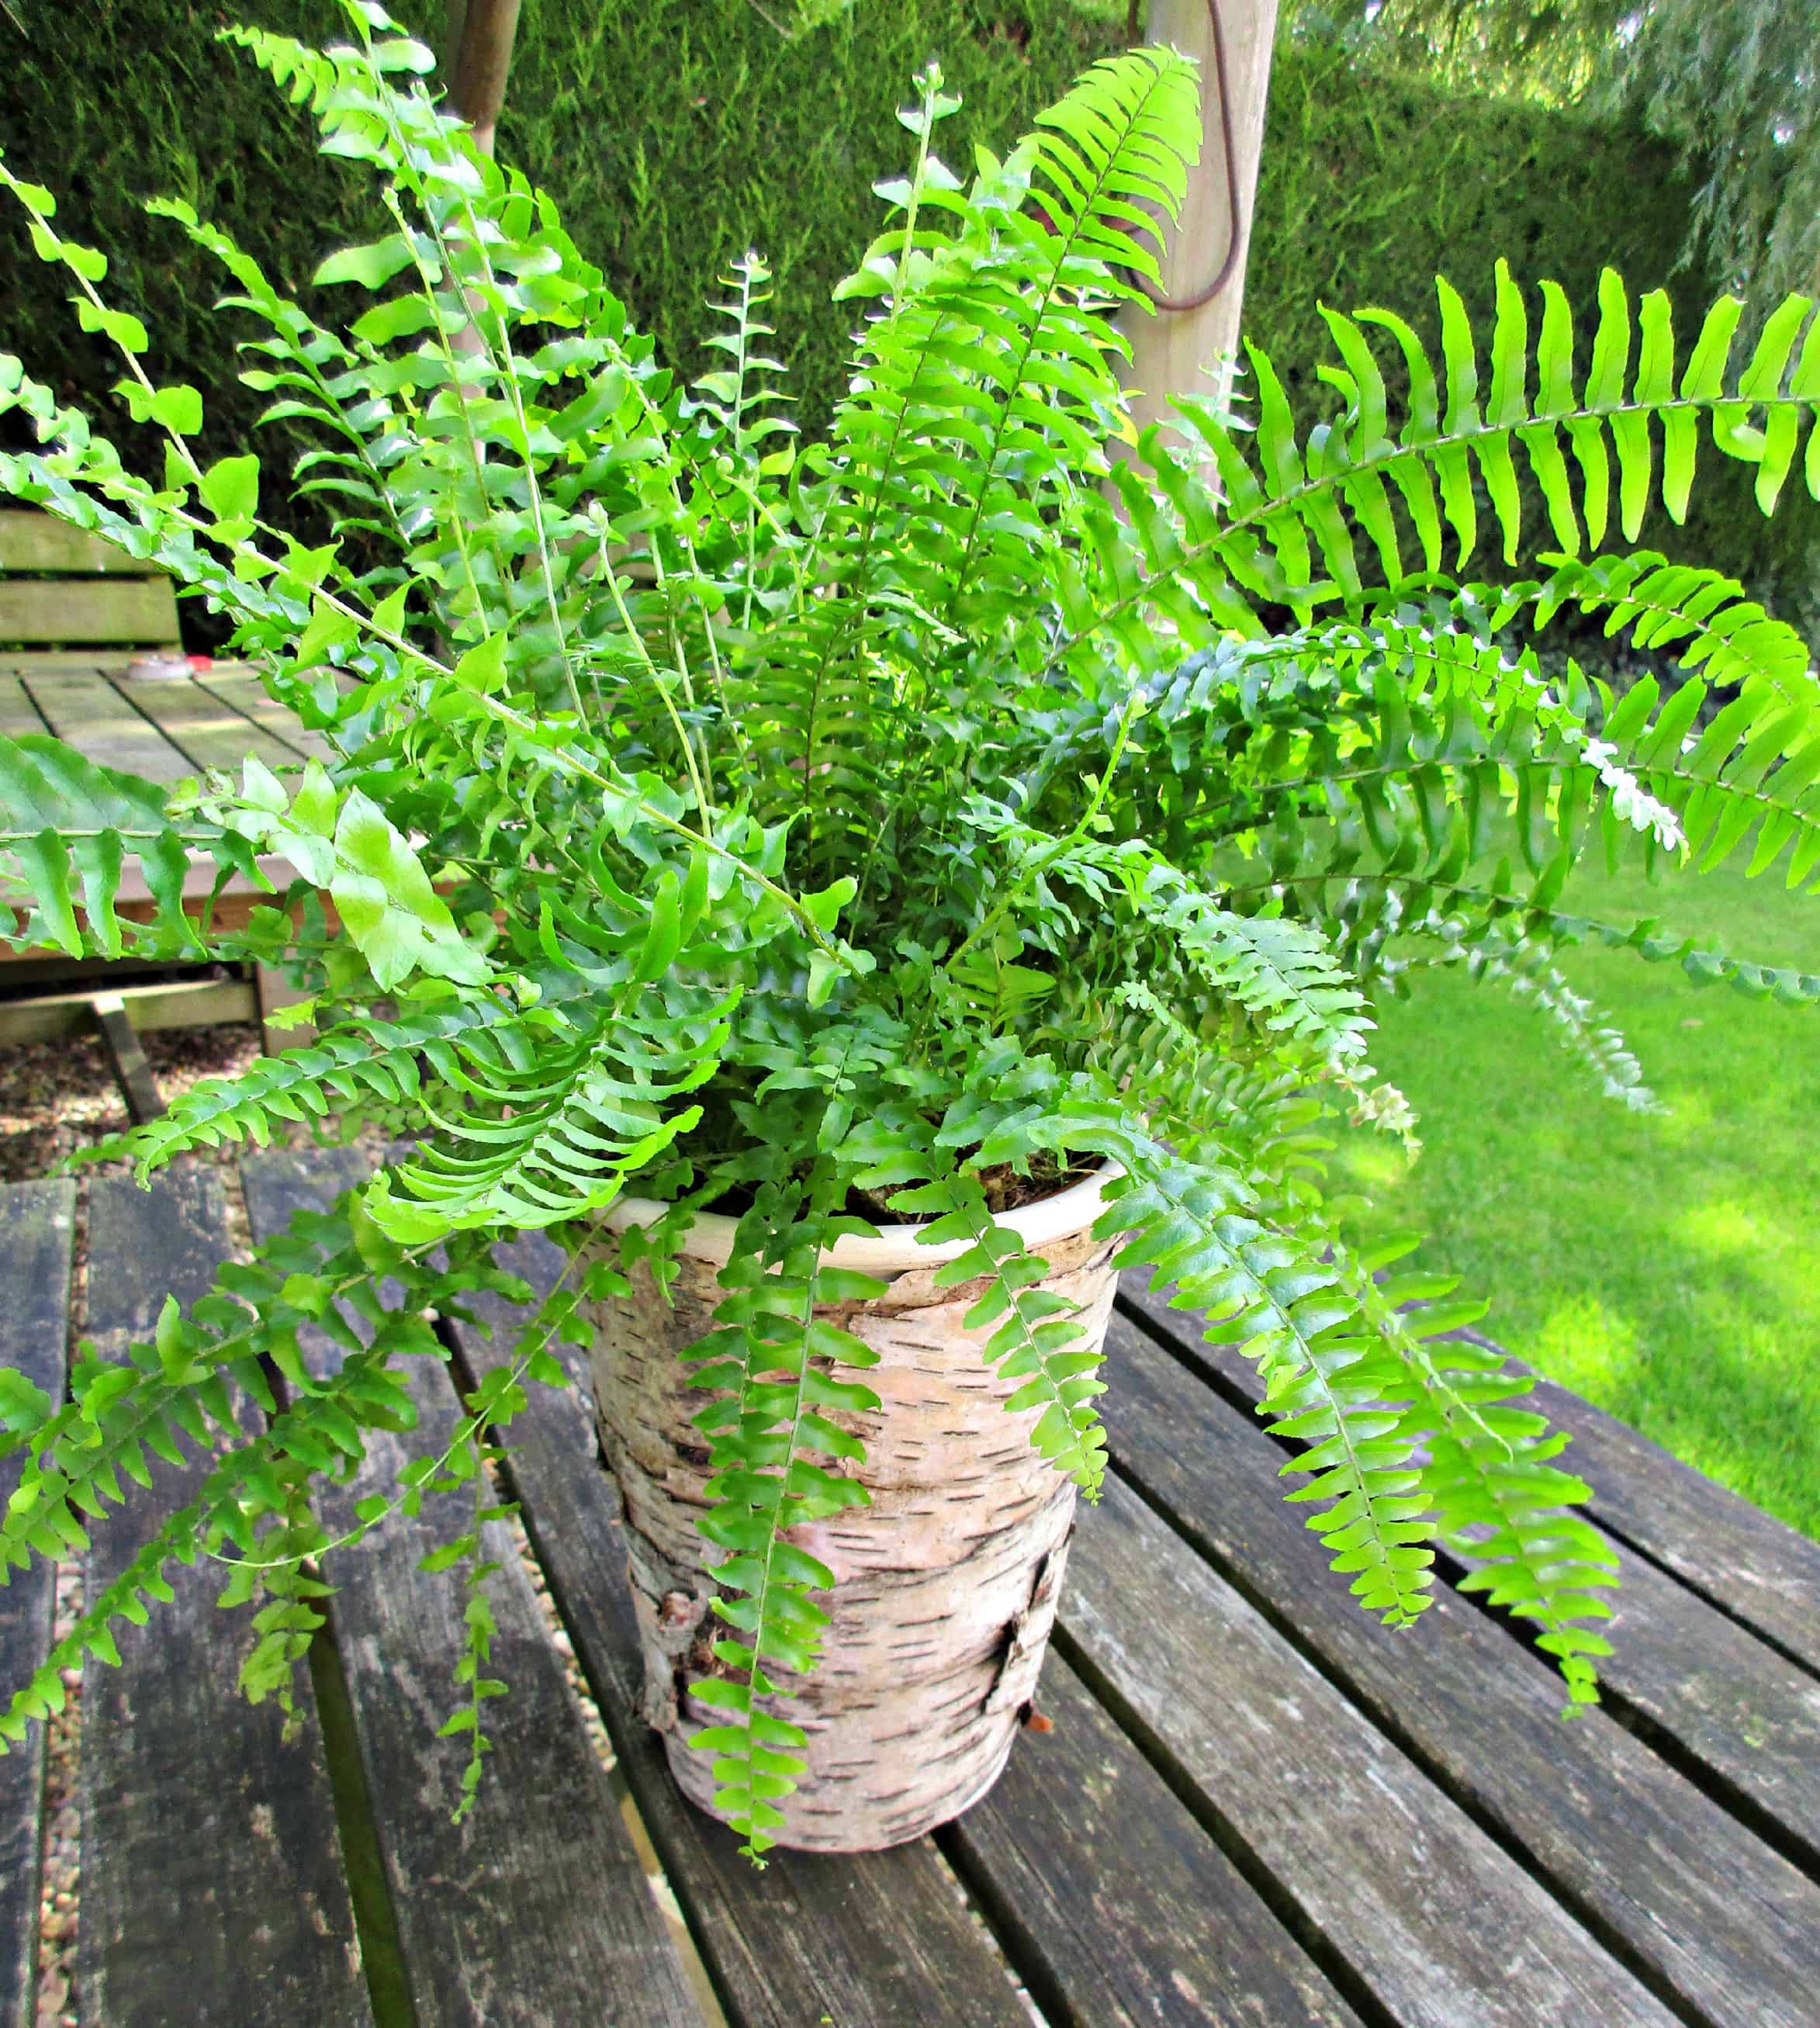
I am absolutely delighted with how our bark covered pot turned out. It has a wonderful rustic home décor feel to it. Now that I’ve found a method that works I have all sorts of objects ear-marked for the rustic bark treatment. If anyone else has come up with other methods of working with bark I’d love to hear about them. Please do leave any tips in the comments below.
We’ve got lots more ideas for decorating flowerpots on our blog. We particularly love our pretty Fabric Covered Flowerpots and our tutorial for Decorating Pots with Preserved Moss. And for more rustic home décor crafts, why not check out our Living Garden Sculpture and our Twig Chandelier.


38 comments
I found your blog today and it is very interesting. I will come back often for find new ideas. I am from Québec.
Thank you so much for your kind comment Christiane. I love how the internet connects us from all over the world :)
I have been looking for some direction on this. Thank your hubby for me!
So pleased that we were helpful Janet, and I will tell him – he’ll be delighted (he loves being right!) :)
Such a simple and stunning idea, I hope this works as well on those ugly plastic nursery pots.
Thanks Deb, I haven’t tried it on plastic pots – if I did I’d probably think about trying to make the surface a little rougher to help the glue stick, perhaps just scratch it up a little :)
I have a Birch Bark ‘vase’ that I made from one piece of birch bark that I picked up on a walk…….I scrape-cleaned the inside of it and it fit perfectly over a large size coffee can! It has fungi still on it. I keep a slender glass for fresh flowers in it and around them I keep rocks so that it won’t be top heavy. It’s a beautiful seasonal vase. Daisies in the summer and bullrushes and leaves in the fall….either silk for fresh it’s beautiful. …infront of a mirror , it’s twice as gorgeous!
Oh that sounds lovely Bonnie, and using the rocks to weight it is a fab idea :)
I was surprised to see the bark in second pic. Looks like a profile of a monkey! Keep this piece add it to a picture> Thank you for the idea,
So it does Patricia, I never noticed that before! I will have to have a look and see if I still have it – thanks :)
I love these so much, I wonder if hubby can get me some birch bark at work so I can try and make some too. Such an inspired idea! Thanks so much for linking up to #HowtoSunday :) x
The finished pots look fab Jenny, and the bark peels off fallen trees really easily so I am sure he could find you some :)
Love these! A similar project is a round glass vase with the bark tied around it with silver wire. Then add water and a floating candle inside! Pretty!
That sounds really pretty Bonita, I’ll give that a go for my Christmas decorations :)
[…] Bark plant pots from Craft Invaders […]
Thanks for featuring us Fiona x
This has such an affective look! What a brilliant way to jazz up a plant pot! Will be looking for fallen birch bark on my next walk! #HowtoSunday
Thanks Kelly, I still love it although I have managed to kill the plant!
Wow, you are super creative! Such a fab idea, and can you imagine how much this would cost to buy already made from the shops. #HowtoSunday
Thanks Annette :) Once I worked out the method it was easy to do, and its a lovely effect
oooh, oooh, oooh. I love it! Such a simple idea but so stunning. #trash2treasure
You’ll be sticking bark to everything before you know it! Thanks for visiting :)
I am always surprised by the minds of others, and how creative they are. You surprised me, big time. The pot looks just like a birch tree with the bark peeling of the real tree, just a bit here and there, love your creativity and I would love to have a pot like this! Pinning!
Thanks so much for the lovely comment :) and thanks for pinning!
how pretty. these would make a great present for a grandparent. Is the bark paintable to personalise it? #whatevertheweather
I haven’t ever tried to paint bark – I imagine it’d take some experimentation as I’d guess it contains waxes to help it throw off water when its acting as a protection to the tree. I did bleach some in Pin-Tested! Bleaching Pine Cones and it definitely lost some colour. I’ll have a play around sometime and let you know :)
Such a lovely effect here Sarah, your response to your husband made me smile, I would be the same but things are always obvious once you know! The natural rustic finish is inspired and a great upcycling idea.
Thank you so much for sharing with me on #Trash2Treasure
Thanks for your kind comments Fiona, we love linking up to #Trash2Treasure, its full of the sorts of projects that inspire us :)
This is so creative!! What a clever idea and it really brings the plant pot to life. This would look so cool indoors or outdoors. Thank you for sharing the tutorial. I have so plant posts that need updating and we were playing around in the woods the other day and there was lots of bark like this on the floor. :-D Thank you so much for linking this up to #whatevertheweather x
Thank you, we love how the bark looks too :) We’re making some to put winter bulbs in which we think will look really pretty with some moss on top and little bulbs peeping through. Thanks for having us on #WhatevertheWeather x
This is a fantastic idea! I love how it’s turned out, a great country feel, I should do this to some of the pots in the house. I didn’t realise that bark sticks so well, must think up some other ideas to use this for too, it would be great for some unique art work. You have some fab ideas!
Thank you so much for linking up to #Whatevertheweather :) x
I was so pleased when I worked out how to stick the bark! Thank you for your lovely comments and for having us on #WhatevertheWeather
Absolutely clever and beautiful! I also love that fern! Thank you for linking with #momsterslink
Thanks for your kind comments, and for having us on #Momsterlink
What a fantastic effect – I love how they really add a difference to the pot and make it look so natural. Welcome to #PoCoLo – and thanks for your email, I will get back to you this week. Thanks for linking and hope to see you next week x
Thanks for visiting, and hosting #PoCoLo x
What a great idea – love the rustic look. Many thanks for sharing this fabulous technique!
Thanks for your kind comment, am really pleased that I worked this technique out :)