Glass gems, with their beautiful jewel-like finish, are a wonderful material to craft with. They are useful in many projects, but adding light to the mix really brings them alive.
In this tutorial, we show you how to make your own beautiful glass gem lantern that is perfect to hold a candle or LED lights. You’ll be amazed at how simple it is to make.
Disclosure: I am delighted to be working with Bostik as a Bostik Blogger. Each month the Bostik Bloggers create a craft that our readers can easily re-create at home.
What we used to make our Glass Gem Lantern.
- Mason Jar (Amazon affiliate link)
- Glass Gems (we used a mix of colours) – (Amazon affiliate link)
- Bostik All Purpose Glue (Amazon affiliate link)
- Large tea-light candle

I decided to use a Mason jar for the base of our glass gem lantern. Mason jars have the useful characteristic of having a two-part lid. Consisting of a ring and plate, this combination allows you to have your finished jar open (by not using the plate) but still use the ring to give a completed look.
Bostik All Purpose is the glue that I recommend using to stick the glass gems onto the jar. It is a clear, extra strong and quick drying glue. It will bond a huge variety of materials. The list includes metals, wood, glass, china, leather, felt, canvas, paper and cardboard as well as many plastics and fabrics. Its quick bonding properties are brilliant for crafts where you don’t want to be messing around trying to hold things in place.
Our glass gem lantern is super simple to make. The Bostik All Purpose bonds the glass gems to the jar really well, so we had no problems with gems falling off. The hardest part of this project was working out how to arrange the gems.
How to make a Glass Gem Lantern.
With the first glass gem lantern I made, I started at the bottom of the jar and worked up.
Everything went well until I reached the top and found that I had a gap in which the gems wouldn’t fit. This left the jar with an unfinished look which I wasn’t all that happy with, so I decided on a different strategy for my second attempt.

For my second lantern, I worked with my Mason jar ring screwed in place, and the jar positioned upside down. This allowed me to stick the gems neatly just below the collar giving a great finish.
I found that working in batches of four gems at a time kept everything organised and allowed me to select four of a similar size.
I added the Bostik All Purpose glue to the backs of the four gems (they have one flat and one rounded side) then pressed them into position – holding each for just a second or two.

Once the first row of glass gems was in position, I left it to completely dry before I started to add the next layer. This dry base layer offers a bit of extra support for the subsequent rows of gems while they adhere, ensuring that they don’t slip out of position.
For the additional rows, I completed two at a time before giving them a few minutes for the glue to dry before continuing with the next two rows.
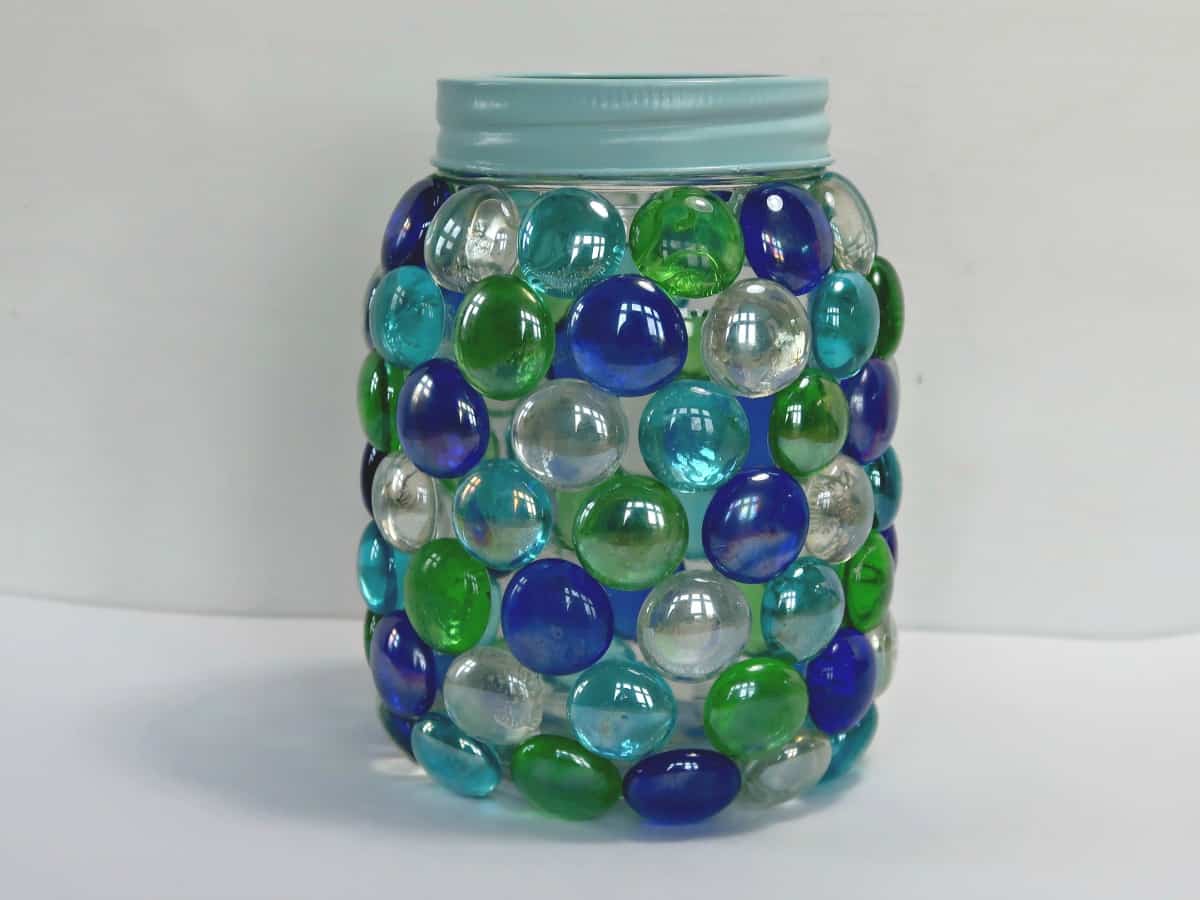
And here is our completed glass gem lantern. The gems look gorgeous, and I am delighted with how the lantern turned out.
I decided to spray the ring around the top a pale blue colour. If you don’t have any spray paint and want to colour yours nail polish also works well on jar lids. You could, of course, use both parts of the lid and use your gem studded jar for storage.

It’s when it gets dark that our glass gem lantern really comes to life. We are using a tea-light in ours, but you could always pop some LEDs or a solar light in it as an alternative.
If you are looking for more crafty inspiration for using different types of Bostik glue please check out our Halloween shadow box display, our easy plantable seed paper and our gorgeous fabric covered notebooks.


8 comments
Here’s a similar but different idea using these jars or any type of glass jar that has a screw off metal lid. Also needed is a solar tealight (Amazon), flat headed screw and a wooden pole such as a dowel around 24 inches long. To make: the flat marbles are applied to the sides like yours but continue on to cover the entire bottom as well. Center lid upside down on pole, drill small hole thru center of lid continuing into the pole just short of the length of the screw and insert the screw. Put the pole into the ground far enough to make sure it’s sturdy. Set a solar tealight candle in the middle of the lid and turn the jar upside down and screw it onto the lid.
Sounds beautiful Jeri, thanks for sharing :)
I love the beaded glass jar with the light in perfect for the bathroom. I used mine on the front porch. I am going to try one in my flower pot. I think it will just add a touch of coor
Thanks Barbara, I think the gems would look gorgeous on a flowerpot :)
I just adore, your beaded jars.
I am looking forward, to making
one, of my own.
Ty DonnaSue ❤️
Thanks Donna, have fun making yours :)
Very nice…
Thanks you Sherri :)