I am delighted to be working with Bostik as a Bostik Blogger. Each month the Bostik Bloggers are set a theme with the challenge to create a craft that our readers can easily re-create at home.
This month’s theme is gardening. The kids, and I decided it was the perfect opportunity to make our end of year teacher’s gifts by making these cute plantable seed paper cards.
Plantable seed paper is paper ready-impregnated with seeds. Although expensive in the shops it is super easy and cheap to make at home using simple household items. Using seed paper avoids all the hassle of planting tiny seeds as well as having to thin out seedlings.
How to make DIY Seed Paper
To make you own seed papers, you can either buy packets of seeds or harvest your own. We used a combination of both using chive seeds from our garden. You can read more about collecting seeds in our 6 reasons to harvest your own seeds post.To make our seed papers we used
- 2-ply kitchen towel
- Bostik White Glu (Amazon affiliate link)
- Selection of herb seeds.
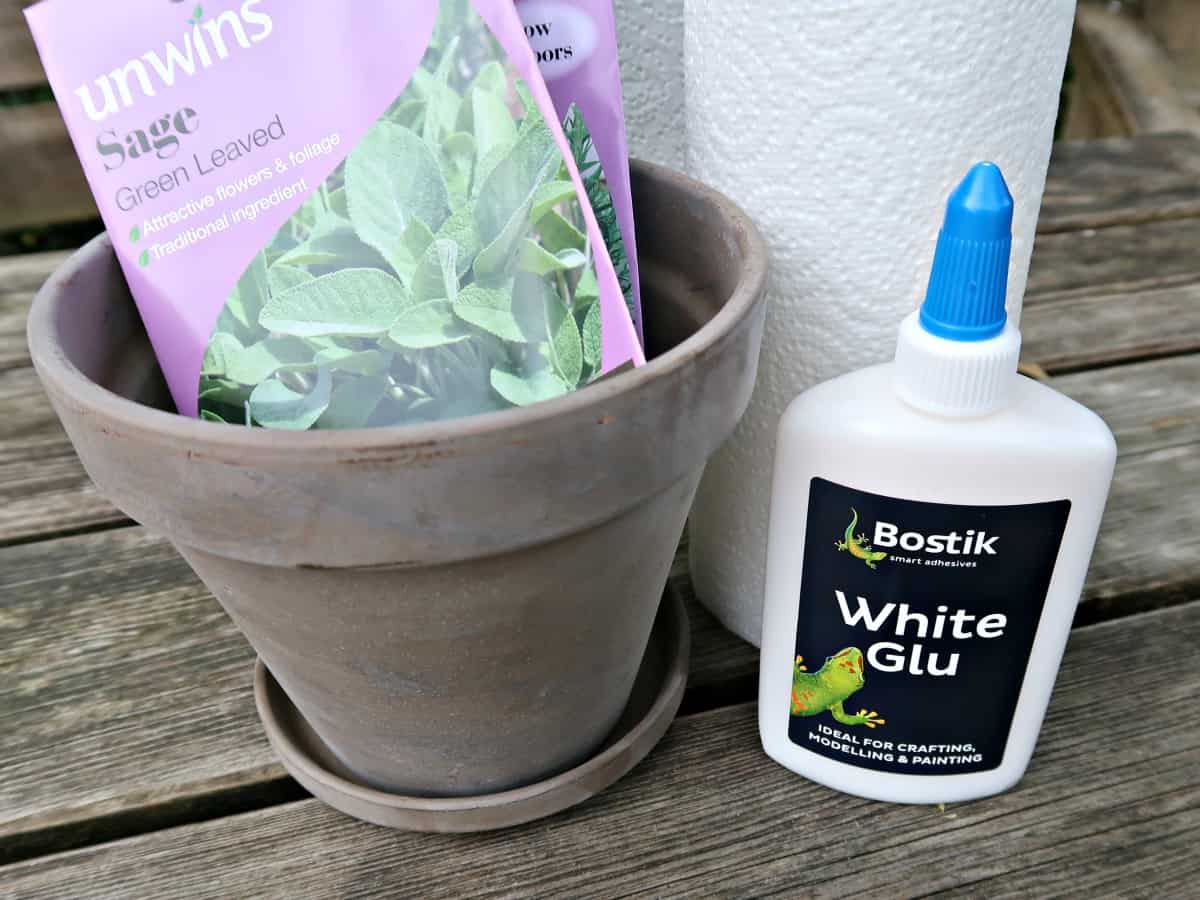
Bostik White Glu is perfect for making seed paper as it is both water soluble and non-toxic. It’ll hold the seeds in place until planted, but once watered it will soften and allow the seeds to germinate safely without adding any nasty chemicals to their growing environment. It is also an ideal glue to let kids use without having to worry.

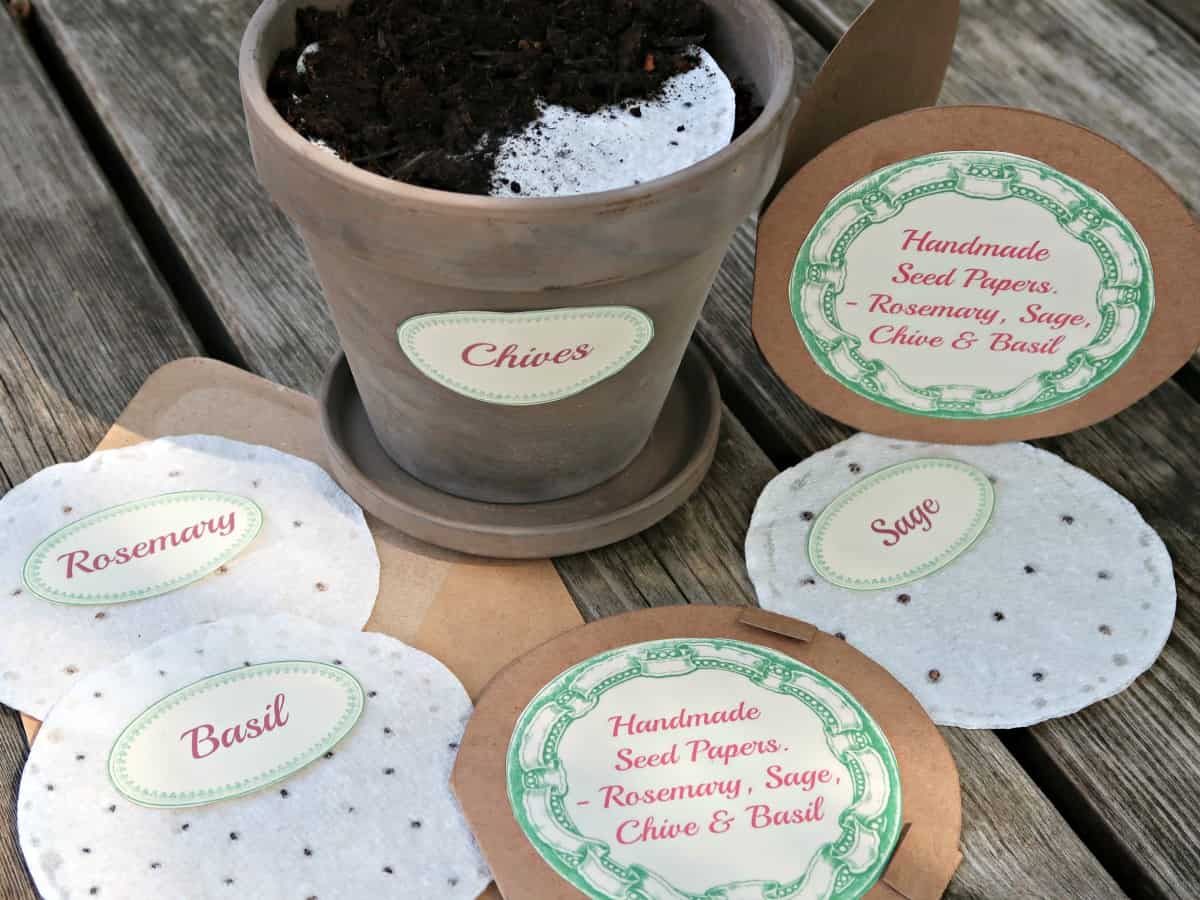
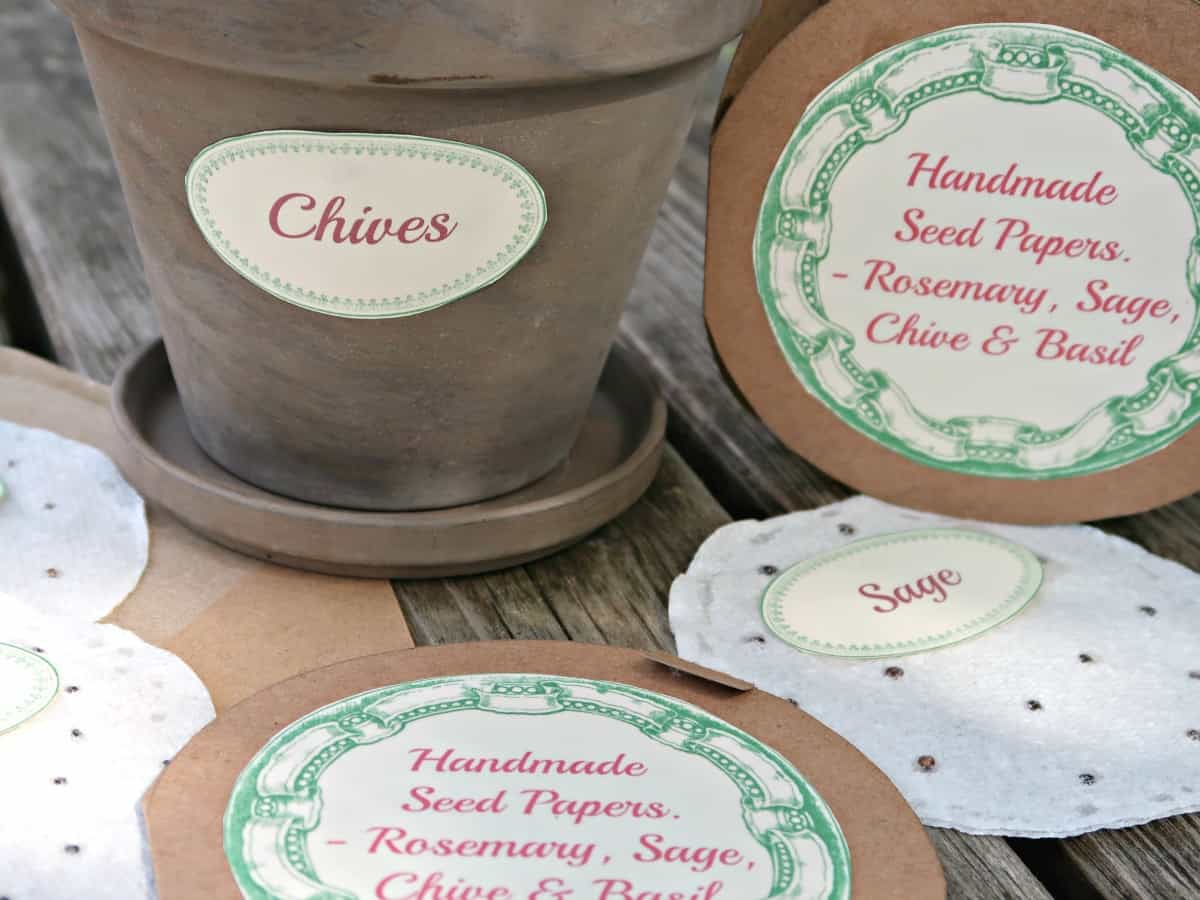
You can make the seed paper any shape you want. We opted to make ours fit some pretty terracotta plant pots that we found at the garden centre. If you decide to make seed paper for vegetables, you might prefer to cut yours into strips ready for planting in perfect rows.
It is easiest to cut the kitchen towel into the required shape before separating the sheets. Once we pull the two layers apart, we find leaving one edge just attached makes it easier to fold back down into place neatly, sandwiching the seeds.
Add little dots of the Bostik White Glu onto the inner surface of the kitchen towel spaced appropriately for the seeds you are using. Then use a moistened cotton bud to pick up the seed and place on the dot of glue.

Once all your seeds are in place, run a thin line of glue around the edge of your paper and press the upper layer back into place.

Making the Seed Paper Card.
Since we are gifting our seed papers, we decided to make a card to hold them in. We used a blank card from our craft stash, but this method would also be a lovely way to re-use cards that you have received.
We marked out a circle slightly larger than our seed papers keeping a little of the fold of the card and added two tags before cutting out our shape. The picture below is probably a better explanation and shows what you should end up with.

It is possible that our recipients may not want to plant all their seed papers in one go so we used Bostik repositionable glue dots (Amazon) so that they can open and re-seal their cards more than once.

We designed a pretty label to stick on the front of our card as well as some that can be used to label the pots our seed papers are planted in. We popped glue dots on the back of these ones with the protective film left in place ready for our recipients to use.
We think our super simple seed paper crafts makes a lovely, original gift. Their simplicity means that they can be made by children as well as adults, and they really do make planting seeds so much quicker and easier.
]If this tutorial has inspired you to get the glue out why not check out our decoupage with autumn leaves and sticky nature pictures.
10 comments
What a precious end of the year gift idea for a teacher! Add a little shovel and gloves….darling…thank you…I need to get to work…
Thank you so much for you kind comment Candie :)
Do you have a link to print your labels?
I don’t Sandy but I get most of my label templates from https://thegraphicsfairy.com/
The glue doesn’t inhibit the seed from sprouting?
No it doesn’t Tru – mine all germinate fine (as long as you use a non toxic water based glue such as Bostik White Glue or Elmers white school glue :)
Thanks so much. I love your site!
Thank you so much for your kind words Tru – you made my day :)
I want this for me. Things in my lane with a rental and illness are pretty challenging. PRAY that I can do this for me!
I hope things start to improve for you soon Dorothy, crafting definitely boosts my well-being – sending you all our best wishes from the UK