Our DIY Easter egg wreath is decorated with speckled quail eggs, lichen and flower sprigs for the perfect spring door décor. Utilizing a willow base, this spring wreath only takes a few minutes to assemble and looks beautiful, hung on a front door.

My Easter egg wreath is the first time I’ve made a spring wreath. It’s a direct replacement for the Acorn and Pinecone Wreath that I have had up all winter. That wreath looks as perfect as the day I made it, so it is now stored ready for use again next autumn.
I used the same method to make this Easter egg wreath. I hope it will also last more than one season, so I have used a combination of natural and faux materials.
To decorate the wreath base I used faux forsythia sprigs, lichen-covered twigs and oak moss all collected from the ground during a walk. Note: Many of the species lichen found in the wild are protected, so should only be collected once they have fallen to the ground as these had.
The stars of the show are the quail eggs. I used real blown eggs on my wreath (here are some easy instructions on how to blow an egg), but you could easily use a faux alternative if you wish.

What you need to make an Easter Egg Wreath
-
- Blown Quail Eggs, twigs, lichen or moss and faux flower sprigs
-
- Wreath base
-
- Glue gun and sticks
I chose to use a 12-inch willow wreath ring (Amazon Affiliate Link) for my base. You can use any solid wreath base that you can glue onto for this project. If you use styrofoam, I’d suggest painting it or covering it in fabric before you start to pretty it up.
The glue gun that I use is a TEC 305 12mm Craft Glue Gun (Amazon Affiliate Link). It’s designed with crafters in mind and works with a vast range of different glue sticks depending on the glueing materials. For this project, I used TECBOND 261 / 12mm Flexible Glue Sticks to cope with any movement you might get using natural materials.
How to assemble a rustic spring wreath.
I started by threading the lengths of the forsythia sprigs into the willow ring. These stay in place without needing to be glued.

I then began sticking the natural elements onto my wreath base. I find it easiest to add one component at a time when decorating a rustic wreath, so I started with the twigs.

Then added the lichen pieces that I had left to dry for a couple of days before using.

Finally, I added the beautifully patterned quail eggs, which bring this Easter egg wreath to life.

This spring wreath only takes a few minutes to assemble and looks beautiful, hung on our front door.

If you have enjoyed our spring wreath tutorial, why not check out some other nature-based crafts. You can find a selection of our favourites below.
How to Make Super Easy Plantable Seed Paper Cards.
We show you how to make Super Easy Plantable Seed Paper Cards using White Glue and Kitchen Towel. Perfect for the kids to make as a gift.

How to Make a Chicken Wire and Moss Toadstool
Easy step by step instructions to make a wonderful chicken wire sculpture shaped into a moss and succulent toadstool.

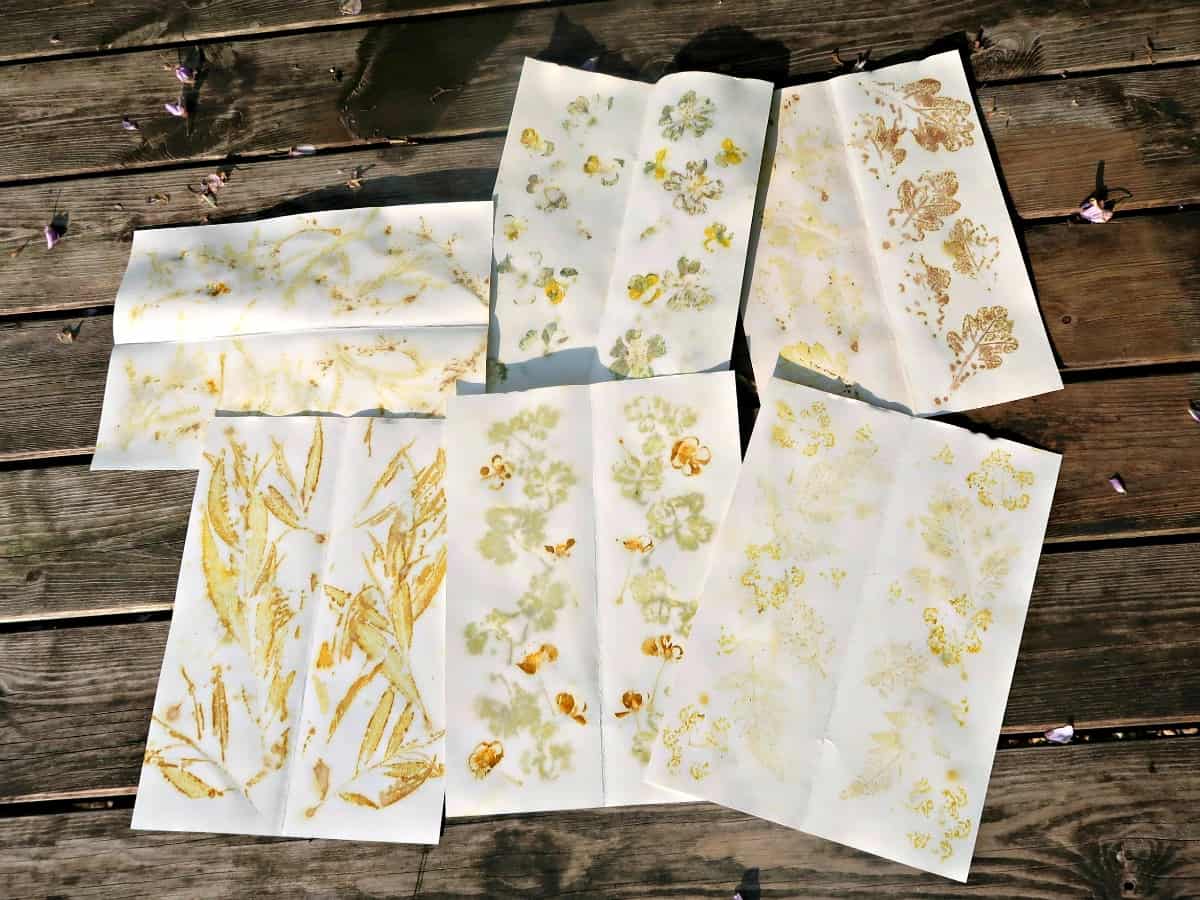
How to make unique eco prints using a steamer
Have you ever heard of Eco Prints? Eco printing is the process of using natural plant materials such as leaves, flowers and bark to dye paper or textiles.
How to Make Birch Bark Covered Flowerpots
DIY Birch bark covered flowerpots are an easy and cheap pot decoration idea and fit perfectly into a rustic home decor theme.

2 comments
Hi there I think the wreath looks lovely, but you really ought to warn your readers that it is illegal to pick lichen in the wild without a license. If you find it on the ground, you can pick it up, but you should never pick it from trees or bushes unless they are growing in your garden.
Thanks Janet, you are absolutely right. I amended the post to make it a bit clearer :)