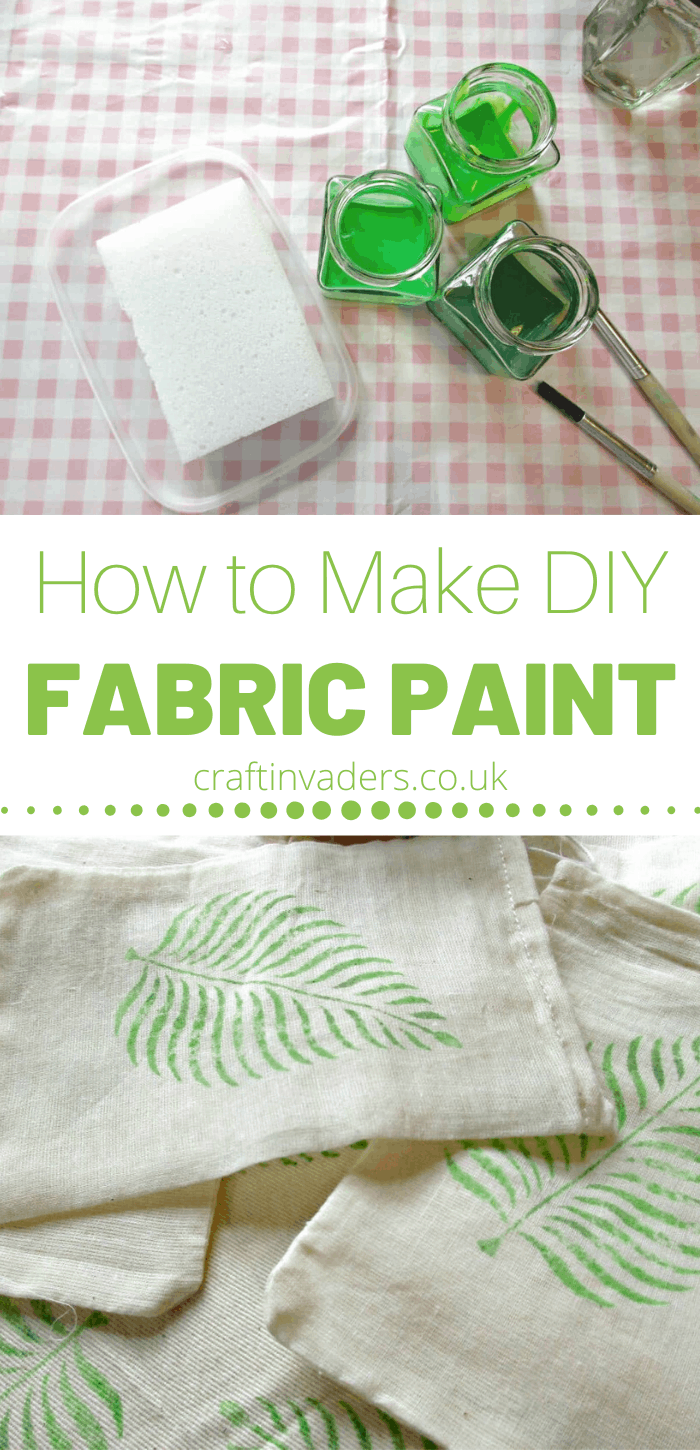
In this tutorial we show you how to make fabric paint from acrylic paint by adding household ingredients.
The result is a DIY fabric paint that not only looks fabulous, it is also washable and doesn’t need setting with heat.
Over the weekend, the kids and I visited a country fair. Poking around the craft tent, I was delighted to come across some hand carved, printing blocks. I knew exactly what I wanted us to use them for. To stamp on some little muslin bags we have for another project. But we need the stamped bags to be washable!
A quick google suggests that you can turn acrylic paints into homemade fabric paint – just by adding an acrylic paint medium. Which would be perfect if we had some, but we didn’t, so I had to delve a little deeper.
What is fabric medium?
Fabric medium is a solution you add to acrylic paints to increase their ability to bind to fabric. Also know as textile medium, it gives the acrylic paint a softer more flexible finish, making it easier to paint on to fabric and reducing bleeding. It thins the paint without diluting the colour, and encourages the paint to adhere to the fabric, particularly once it has been heat set.
How do you make fabric medium?
A couple of artist sites suggest adding glycerine to acrylic paints, to make them act more like oil paints.
Others recommended adding water to make them more like a fabric paint.
We decided to do both, and added vinegar to the mix hoping it would encourage the colour to ‘fix’ to the fabric. Vinegar is often used as a mordant in traditional dyeing, which we tried in our Turning Stains into Dyes tutorial. Now we had our ‘DIY fabric medium’ recipe.

How To Make Fabric Paint.
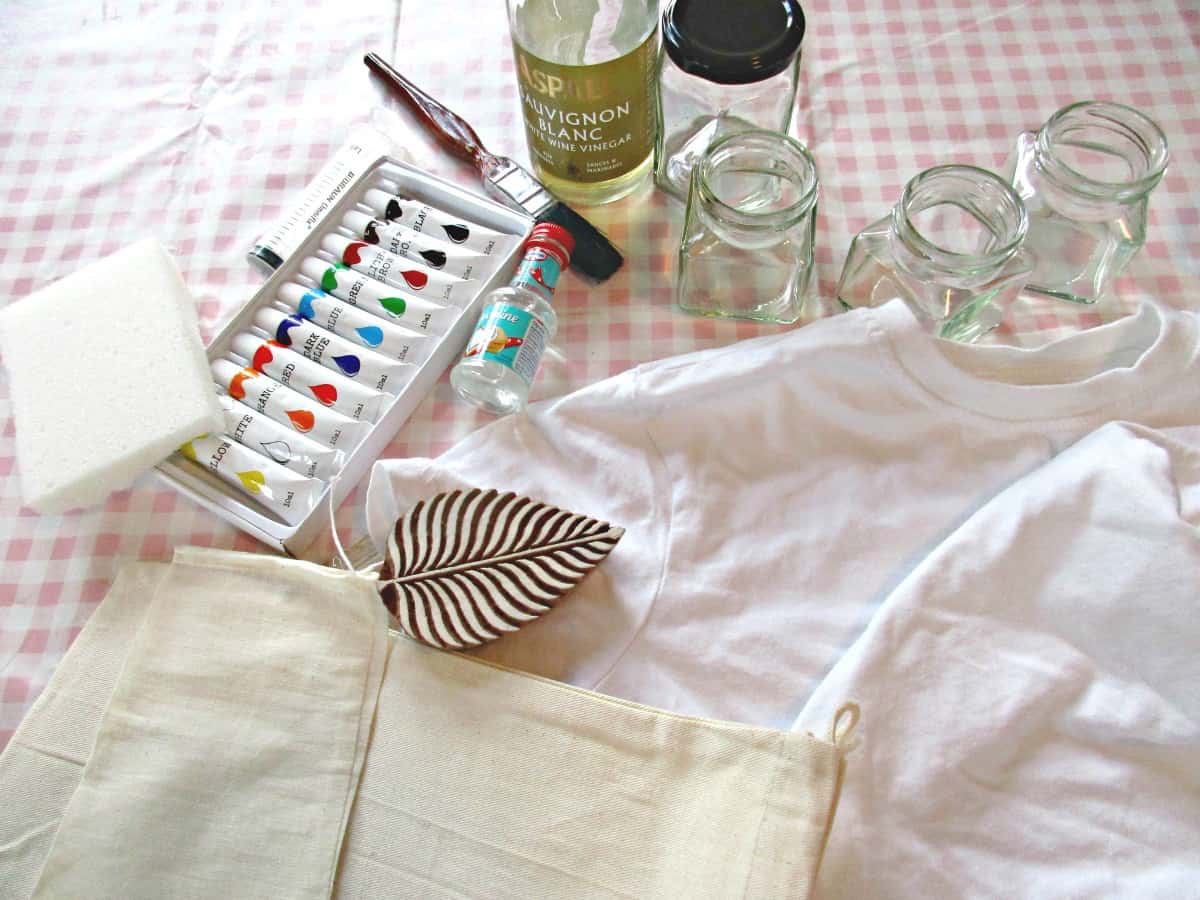
Ingredients needed to make homemade fabric paint medium.
- White Vinegar.
- Glycerine.
- Tap Water.
First we mixed 10mls white vinegar, 10mls glycerine and 20mls water in a jar and gave it a shake.
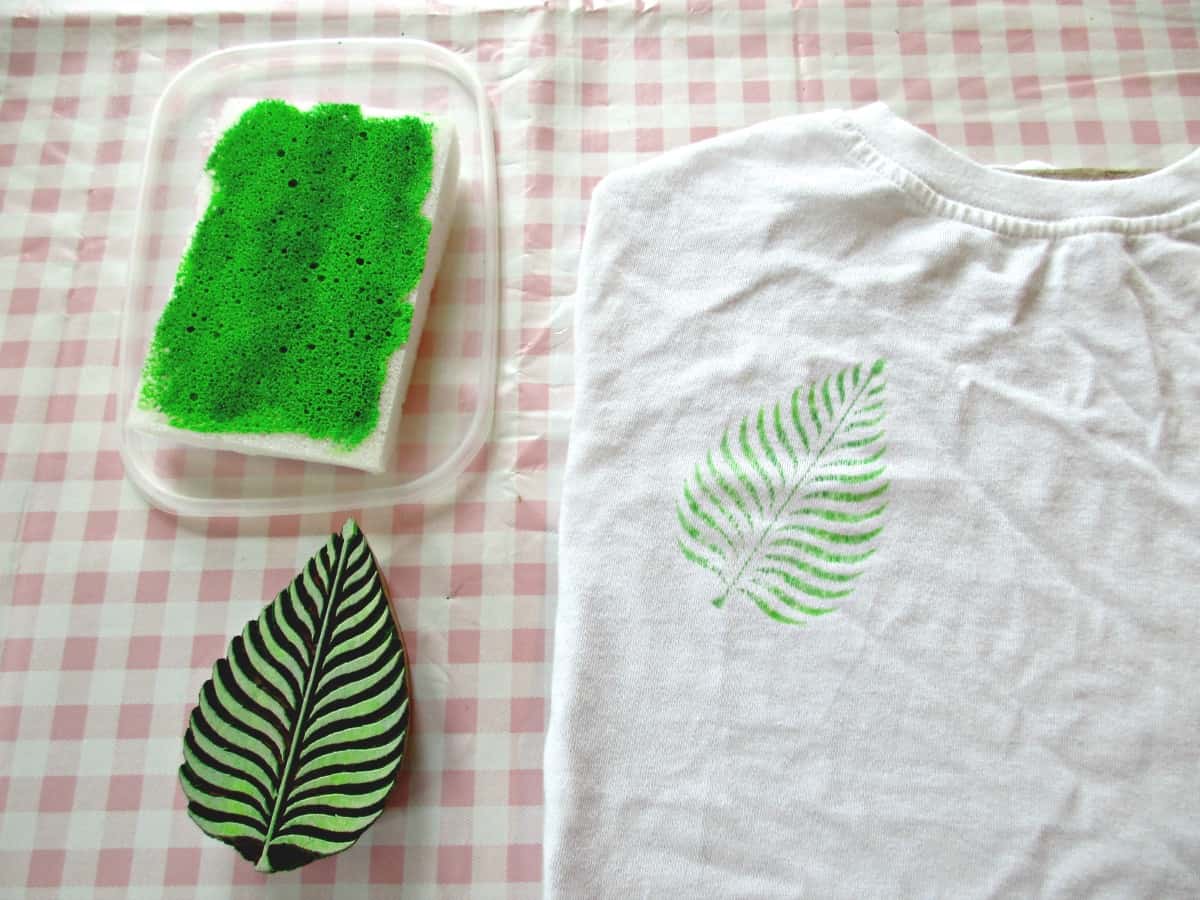
We then used a small amount of our DIY textile medium to thin down our acrylic paints to make fabric paint. We thinned our fabric paint mixture so that is was the consistency of an ink.
Altogether we mixed 3 slightly different shades of green using our fabric paint recipe, and then applied them to a sponge with a brush, to use as an ink pad.
The stamp we used was a pretty Indian wood block stamp (Amazon affiliate link) and we stamped onto small muslin bags and cotton bags (Amazon affiliate link).
Using our DIY Fabric Paint.
We used an old T-shirt to try out the stamping and it looked fab.
Most traditional fabric paints need to be fixed with heat so we decided to test if ours did. Once the paint was dry I ironed the bottom half of the T-shirt (the bottom 3 leaves in the picture below), keeping well away from the top – to see how much difference it would make.
I then threw the T-shirt in the washing machine with a detergent capsule and put it through a 40C wash (with my fingers tightly crossed!).
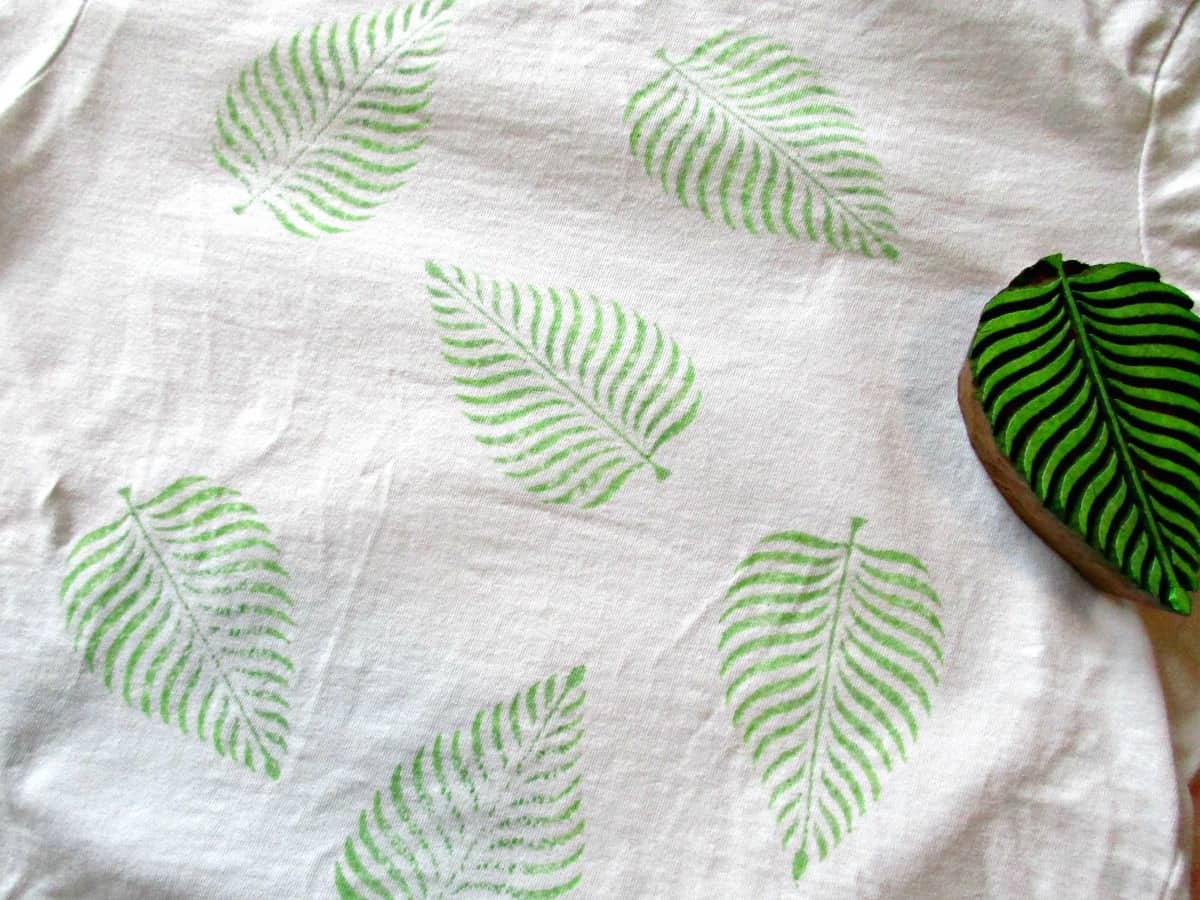
We were delighted to see all the leaves intact when I removed the top from the washing machine. The non ironed stamped images are just as bright as the heat set ones, so the fabric medium recipe definitely did its job!
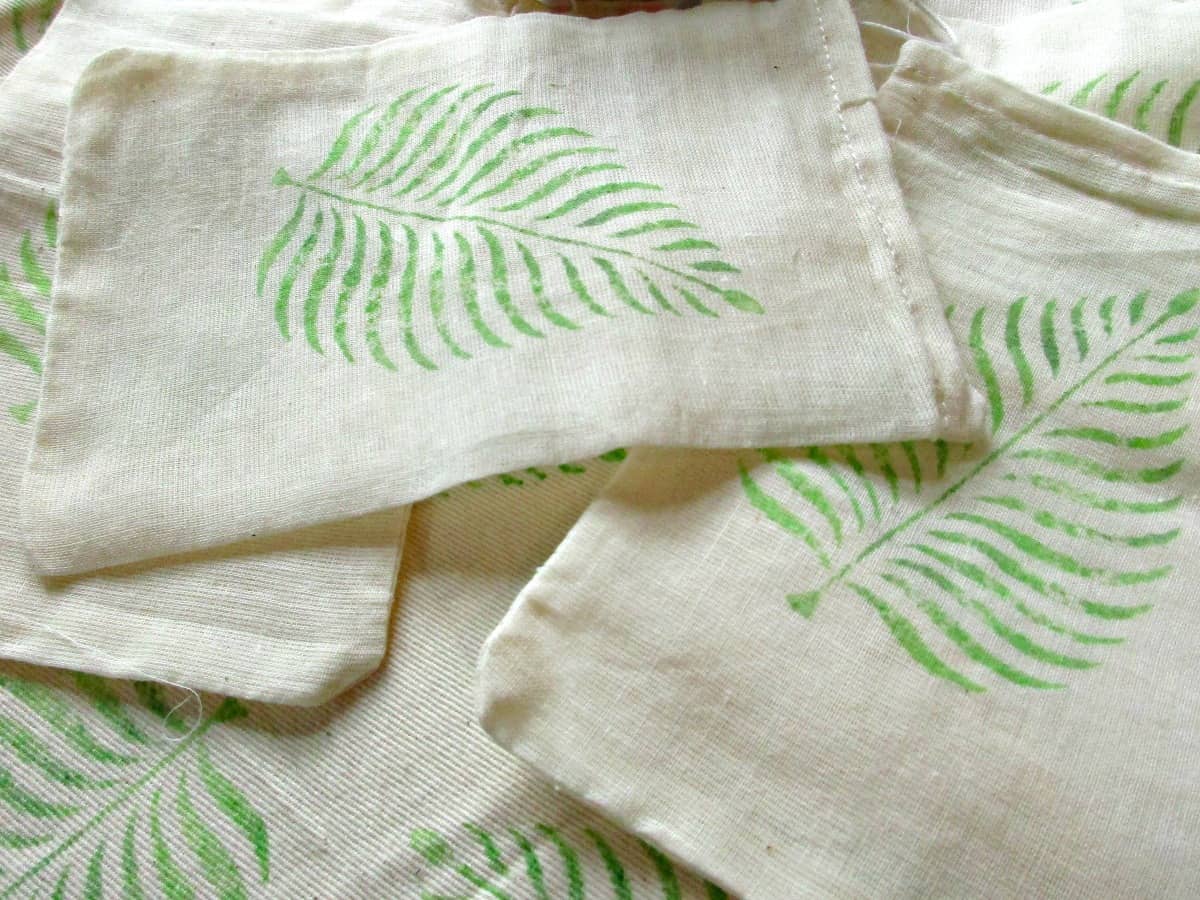
We managed to stamp lots of muslin and cotton bags during our session.
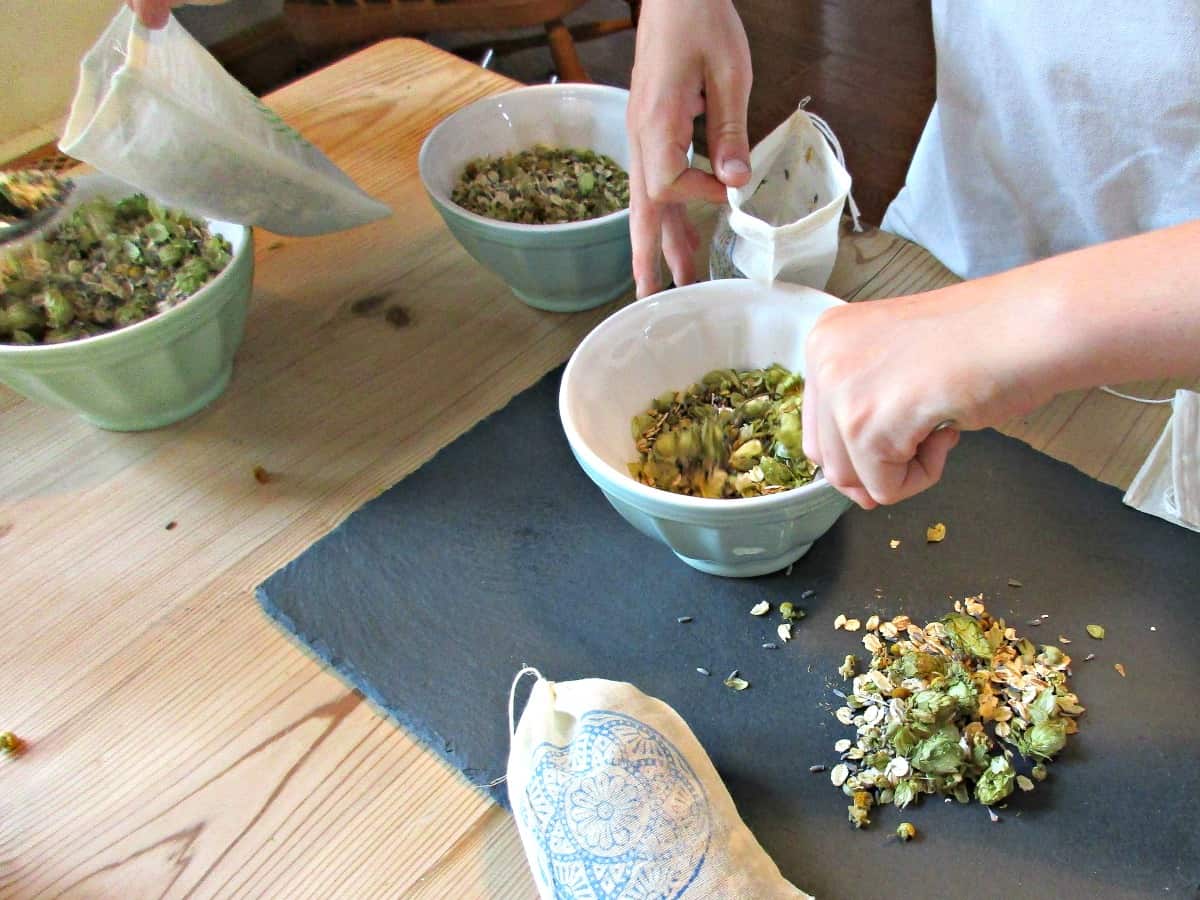
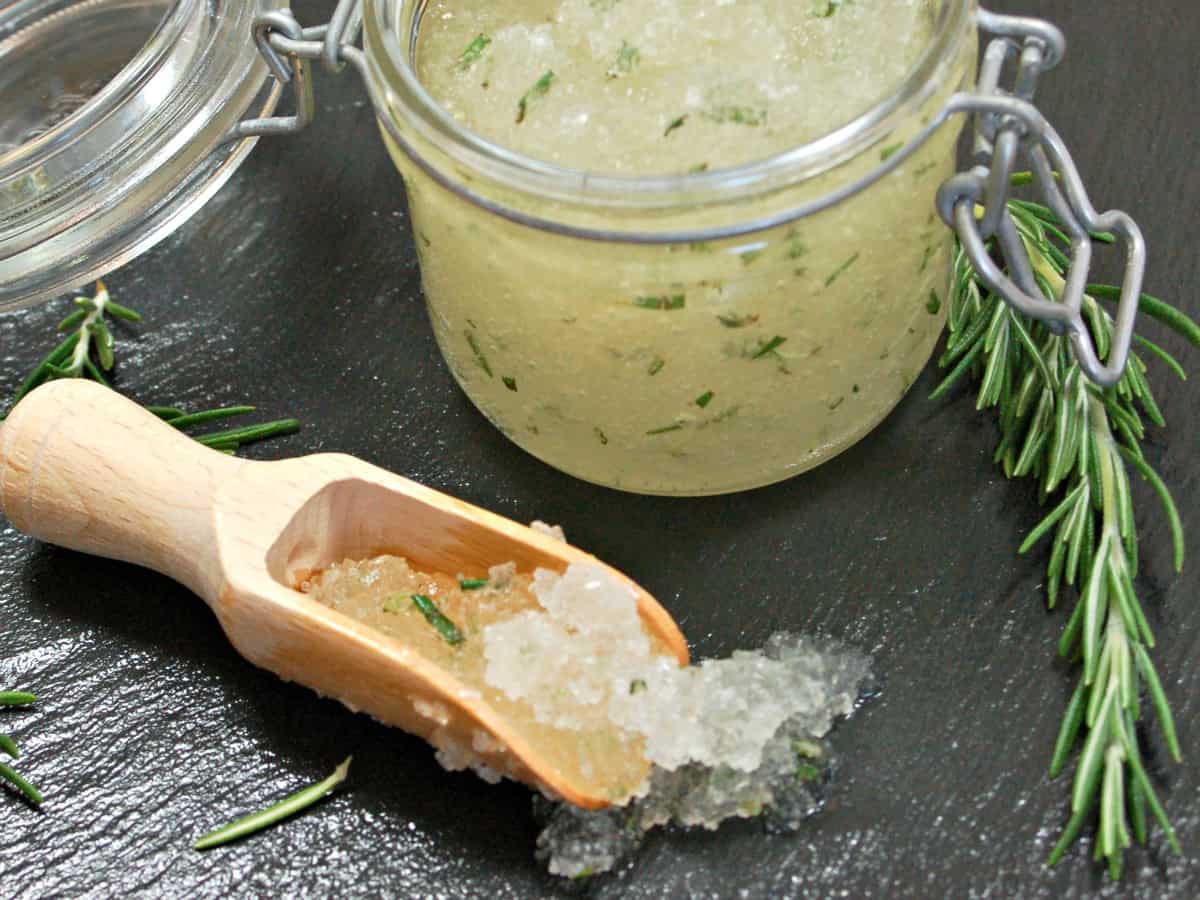
We used our hand printed bags to make some gorgeous herbal bath soaks. Because this DIY fabric paint is so easy to make and use, it’s perfect for kids to use to make gifts for their teachers.
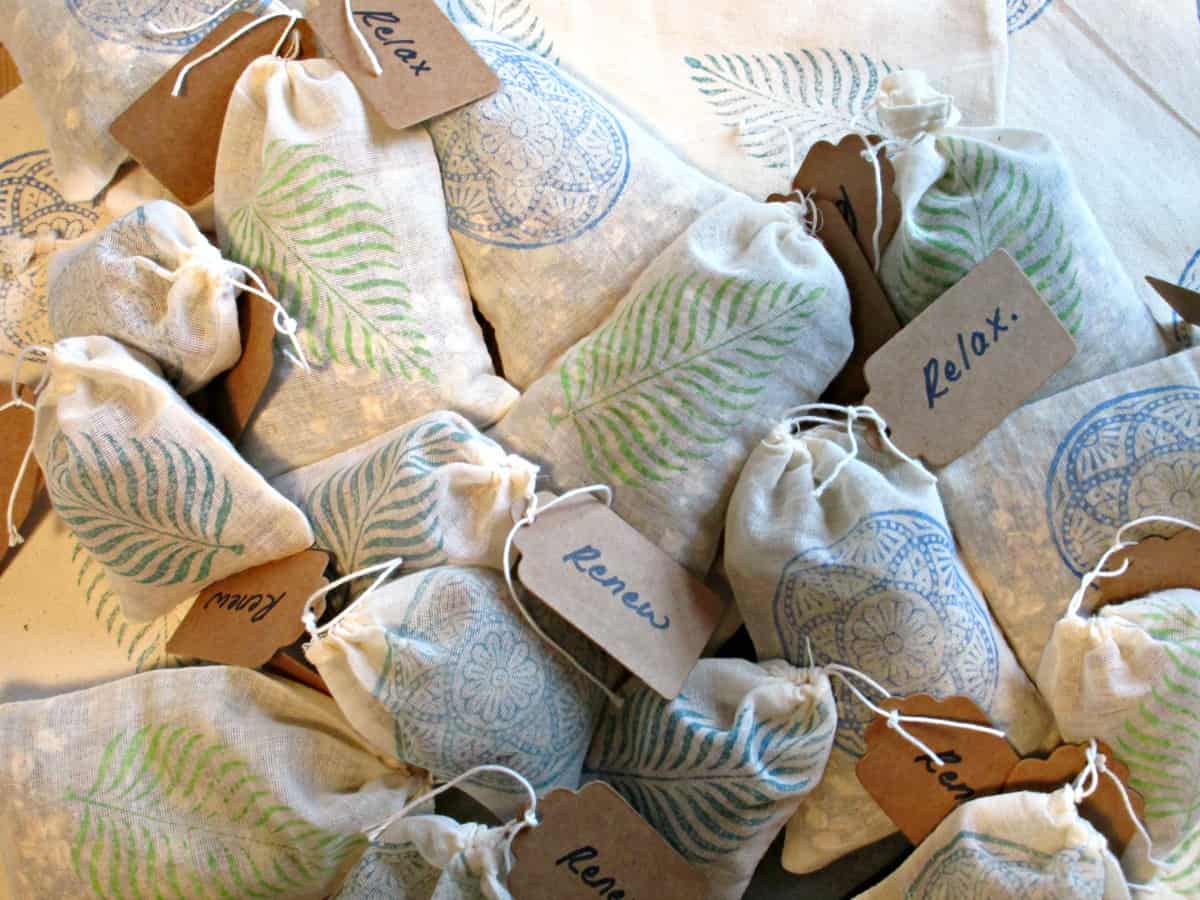
Not only did the kids have lots of fun printing the bags, they also loved combining some gorgeous herbs to make both relaxing and invigorating blends.
There are so many plants that have a positive action on your skin, making them perfect to use in bath products. Our 21 Botanicals that are fabulous for your skin post doesn’t cover every single one, but will certainly give you a good starting point if you’d like to learn a little more.
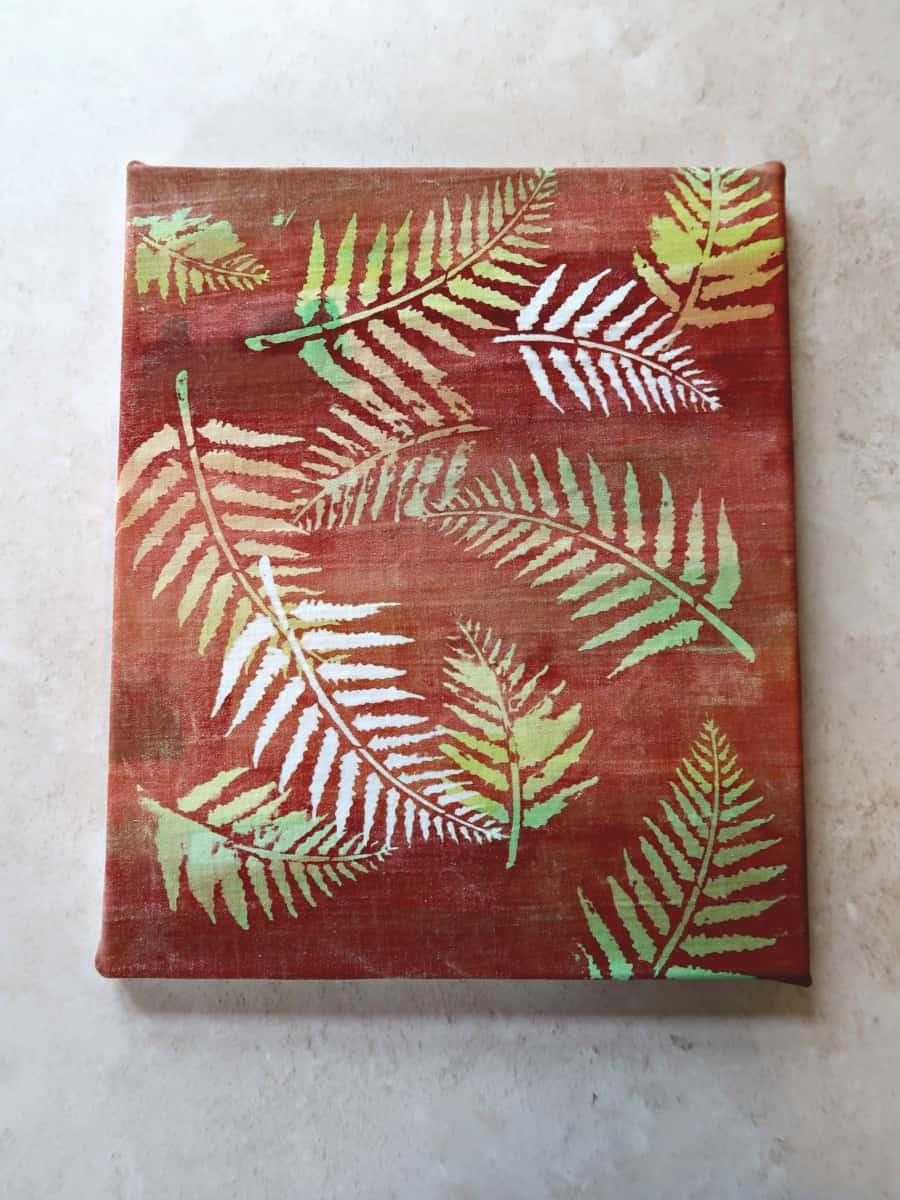
More Fabric Printing Inspiration
We recently used our DIY fabric paint to make batik art on an old pillowcase using a glue stick to provide the resist.
This project only works with fabric paint that is washable without needing to be heated due to using glue on the fabric, so our homemade fabric paint is perfect.
You can see in the photo below how pretty the results were. Visit How to Make Batik Art Using a Glue Stick for the full tutorial.
If our homemade fabric paint has inspired you to try more fabric printing at home you might also be interested in our review of the Screen Sensation home screen printing system.
And for those of you who love natural crafts, our Making Dye from Lichen and Eco Printing posts are both brilliant activities to try at home.
For more homemade gifts you can make at a fraction of the cost of shop bought, check out our favourites below.
How to Make Fantastic Homemade Peppermint Foot Scrub
This simple recipe for Rosemary and Peppermint Foot Scrub ticks every box. It is super quick, super easy and super cheap to make. You probably already have all the ingredients you will need at home.
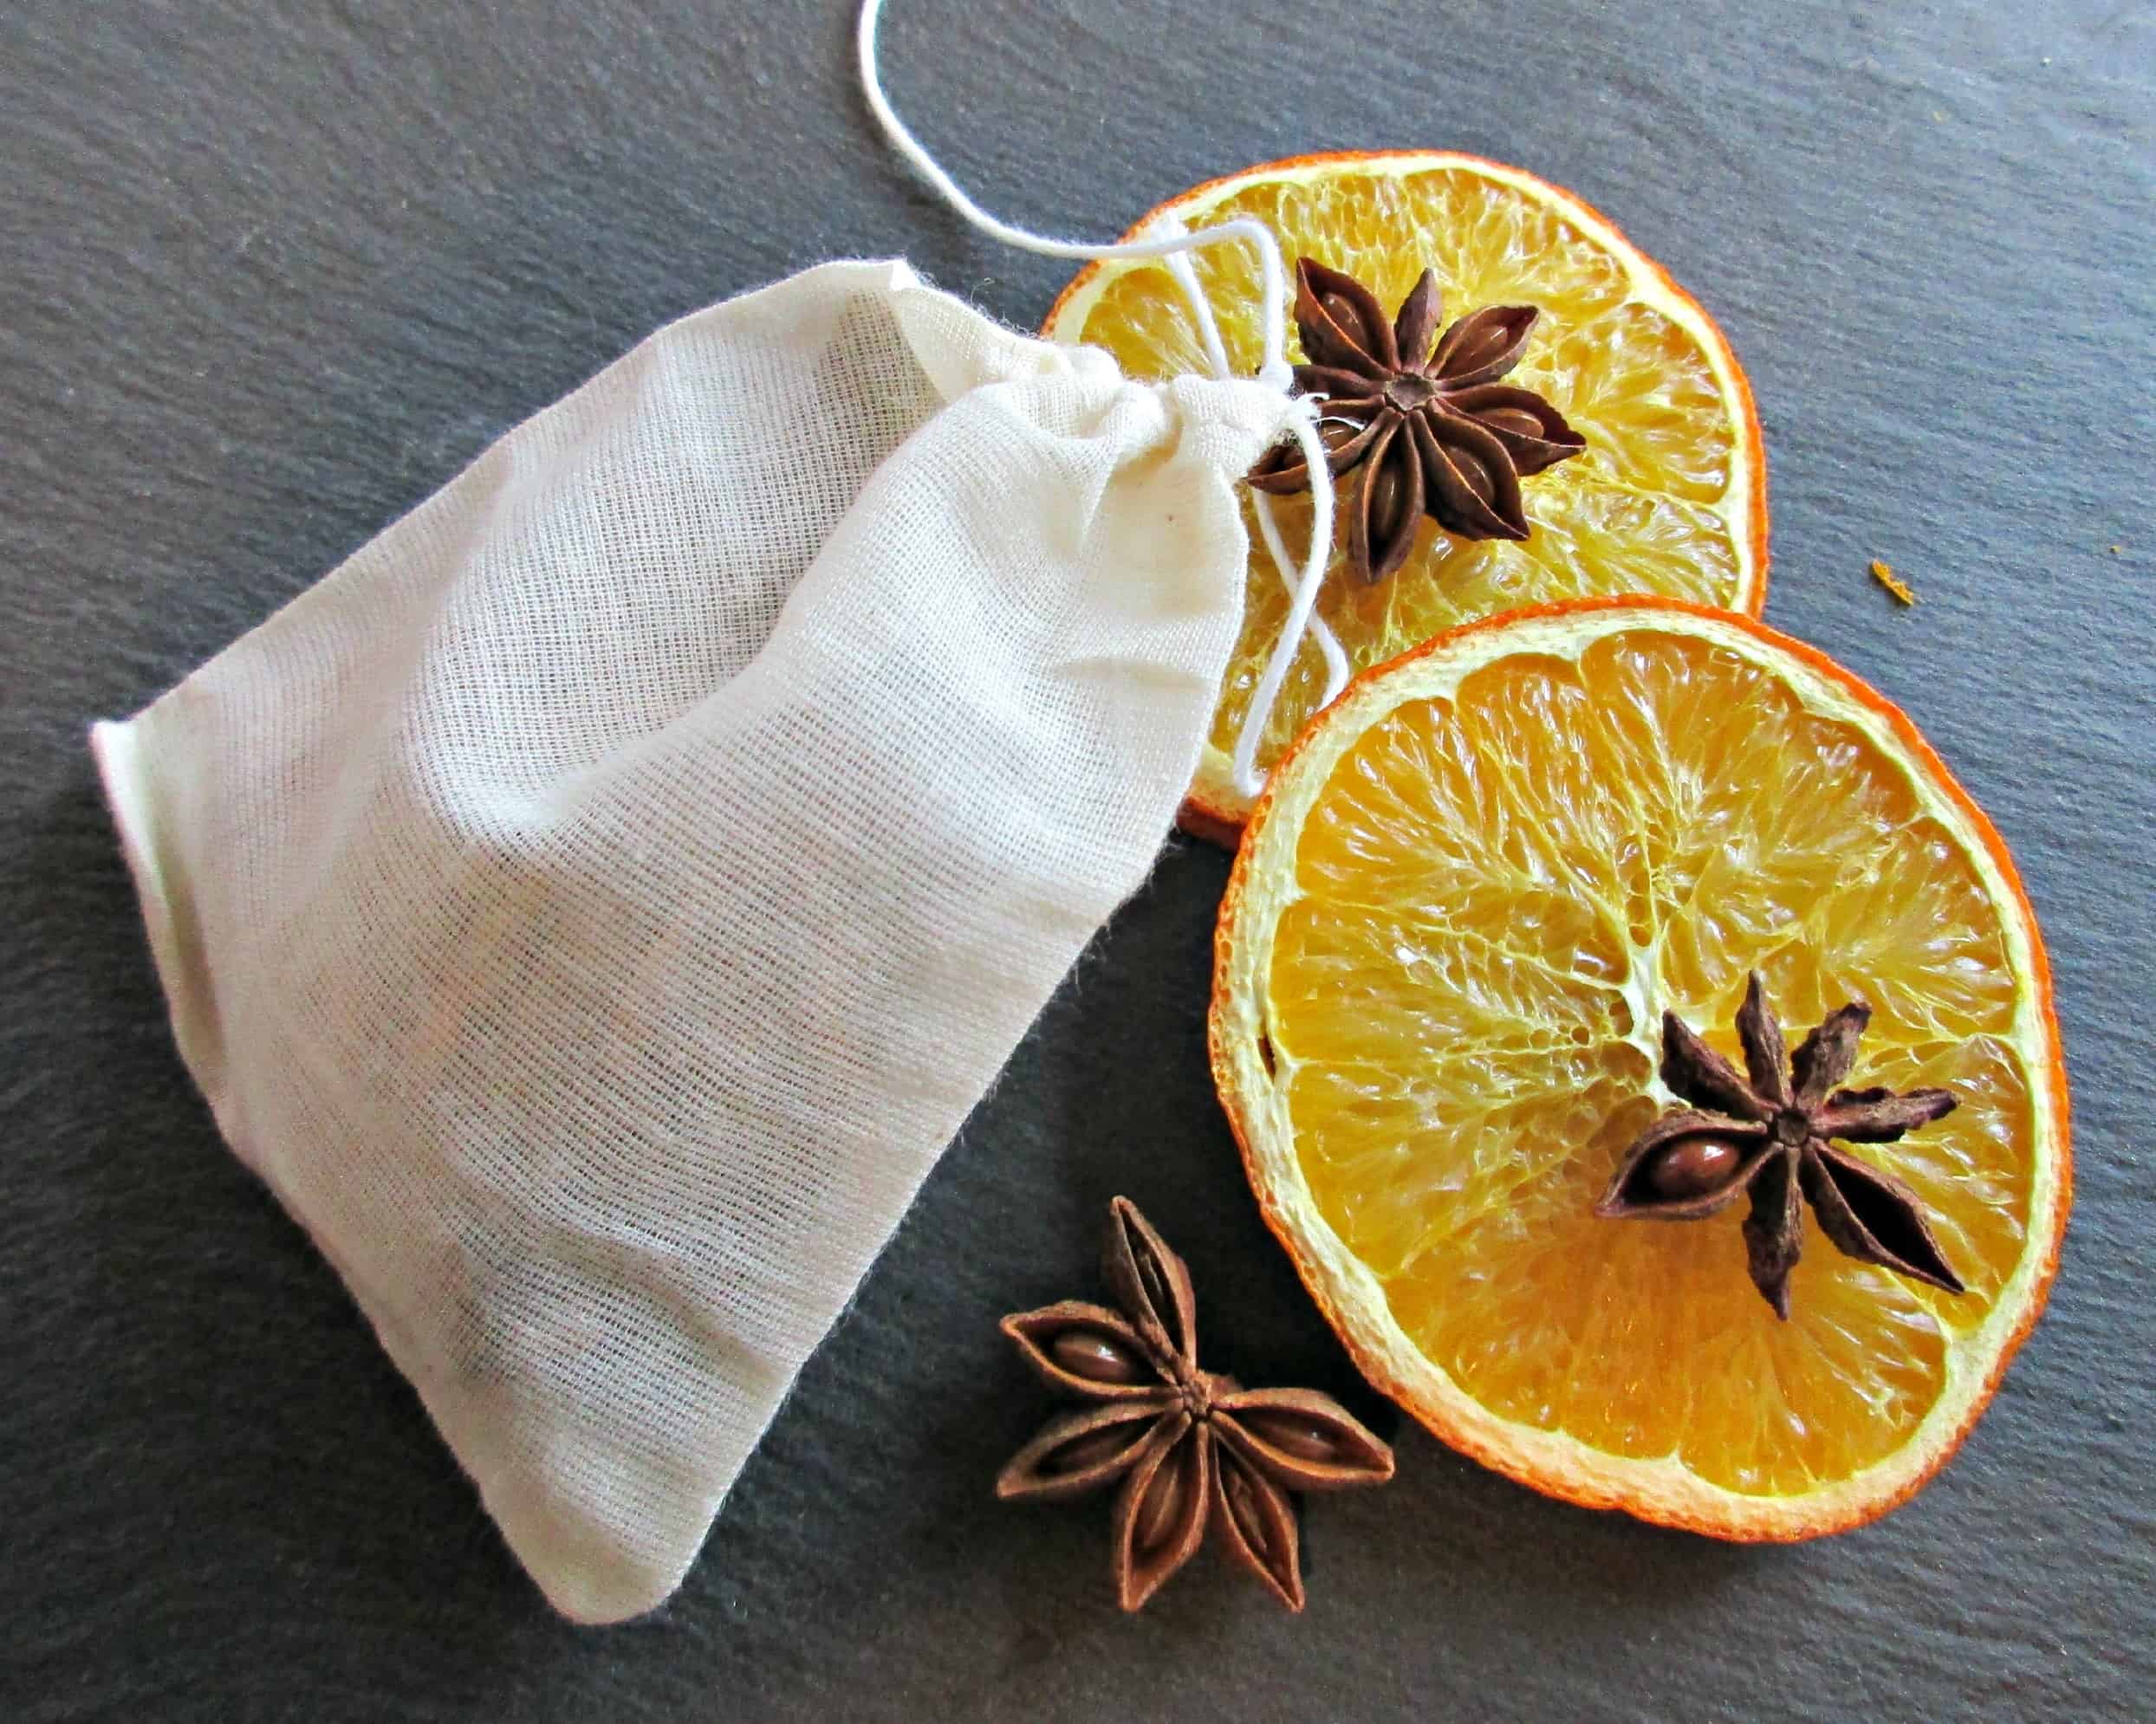
How to Make Homemade Mulling Spice Bags
DIY Mulling Spice Bags make a lovely, thoughtful gift, and can be adapted to suit the taste of the recipient.
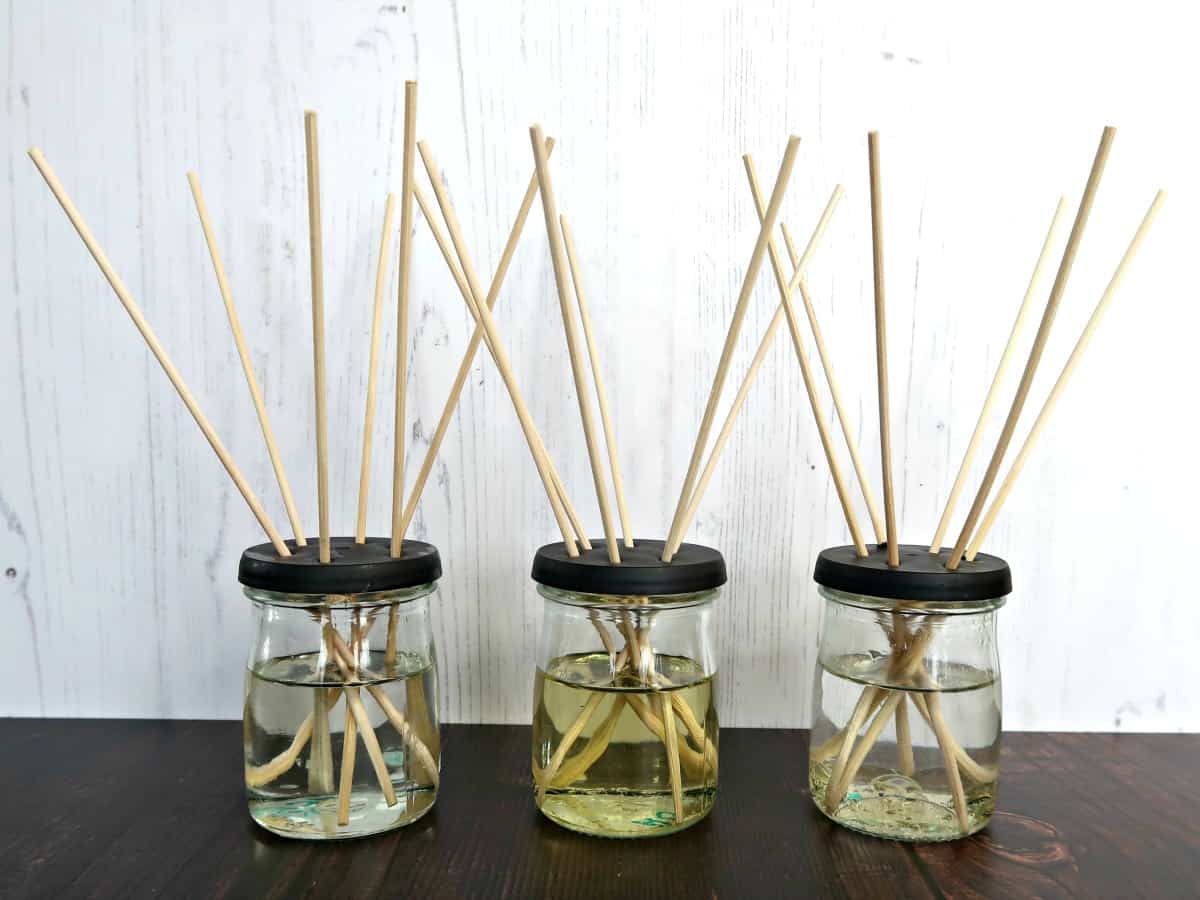
We test the best homemade reed diffuser oil recipes
Love Reed Diffusers but not the price? We test 3 homemade reed diffuser oil recipes to find out which works best, and if any of them are as good as the expensive ones you see in the shops.
136 comments
Hello. I’m not sure if you still reading these but I have an issue with gold fabric paint on a burgundy satin lining. We tried putting a ready-made waterproofing medium over the fabric paint but it made a dark stain on the satin. Any suggestions would be hugely appreciated.
Hi Gary That sounds stressful and I can’t think of any obvious solutions, satin fabrics are known to be difficult to clean and the product is obviously designed to stay put. Are you able to find the data sheet for the waterproofing medium to give you any clues what is in it? Nikwax do do a cleaner for waterproof fabrics which might be gentle enough for a satin fabric but obviously it’d be designed to not remove waterproofing so it’d really depend what is in the medium. Here is the link fyi https://amzn.to/4nx7Bov Do you have any spare fabric you could try out different methods? if you google cleaning satin people often recommend dilute vinegar but I have no experience of trying it myself. Sorry not to be of more help and best of luck x
I just love your craft ideas❤️❤️❤️
I am so charmed to have found your useful post. Hello kindred :)
Thanks for taking the time to comment Faith. Blessings x
Hi! Do you know what can I use if I need the paint to wash off in the washing machine? Thank you!
You can get washable paints and pens for decorating fabric Nat, but I can’t recommend a particular brand as I haven’t tried any of them.
It’s the vinegar that makes the paint curdle. It happened to me and I decided to do some experimenting. For me the glycerin worked just fine on it’s own when mixed with the paint. I had to be able to paint with my mixture with a regular paint brush, but I think mixing in some water is a good idea if you need a thinner ink-like consistency. Just mixing the paint with water (but no glycerin) made the paint a bit blotchy but not impossible to work with.
I set the both the glycerin-paint and water-paint mixtures with heat and had no problems with washing it. BUT! The curdled paint does not hold up to being washed, even if you stir until the lumps are gone. I think the vinegar somehow ruins the paints ability to bond with the fabric.
My best advice is to test a bit of your paint by mixing it with a drop of vinegar. That way you know if it’ll hold up to it or not, before you end up mixing all of your paint with the water/vinegar/glycerin mixture.
Thanks for your tips Emilie :)
I have learned a lot from you! Looking forward to trying the fabric paint and the glue stick batik method! I am sure I have some old pillow cases that could be repurposed. Many thanks!
I can not find the complete recipe for the peppermint and rosemary foot scrub. How do I get to the post to get it? Thank you.
Here’s the link Vicky
https://craftinvaders.co.uk/rosemary-and-peppermint-foot-scrub/
Do you know an easy recipe to make colored stamp pad ink to renew stamp pads? I have a hard time finding yellow.
This post might help Ruth
https://thefrugalcrafter.wordpress.com/2019/03/16/all-my-ink-pad-refill-recipes/
I just want to say thank you SO MUCH for this blog post. I am so excited to try this out. I started a small business a couple months back and am working on a product that will include hand stamped textiles. I’ve been trying to find a more eco-friendly and less expensive alternative to convert my acrylic and latex paint into fabric paint. I was so excited when I found your blog. Doing a lot of product testing over the next couple weeks so will update once I’ve had a chance to play around with it! Just wanted to say THANK YOU in the meantime. :)
Hi Jennifer, thank you so much for commenting and good luck with your new business. I look forward to hearing about your results :)
I’m so inspired! Thank you for this post! I’ve recently found a passion for upcycling old chairs- and after purchasing 5 8oz bottles of Textile Medium (at $13 each!) for a set of 6 chairs I realized there must be a cheaper way. I had been mixing the medium with water, and latex house paint with perfect results on the fabric! I’m curious if you think your recipe would act the same, being painted onto chairs not stamped. I wet my fabric first, and the consistency was very watery, took 3 coats and looks amazing. Do you think your mixture would act similarly?
Again- thank you!!
I haven’t tried it on any furniture myself Raine, so I really can’t say. But I know one of my readers did try it – If you look through the comments she shared how she got on. Good luck with your upcycling :)
Is the textile medium your recipe? How much paint did you use and how much of your medium did you use? I have one saying 1 part glycerine to 5 parts water and 5 parts paint i think its supposed to be a 2 to 1 ratio how does that work? I will try your recipe, thanks so much. I heard the vinegar keeps paint on and it stays bright!
Hi Samantha It’s one part vinegar, one part glycerine and two parts water to make the fabric medium. You then mix the medium into the acrylic paint to make your fabric dye. How much medium to paint really depends on the thickness of the paint and what you are applying it to. In this project we went quite thin as we were stamping, but when I’ve painted with it I’ve left it a bit thicker. I’d suggest starting with ROUGHLY one part medium to five parts paint and if it seems a little thick for what you need thin it down a little more. Hope that helps!
Thank you for your help. Amazing and very innovative. Keep them coming. Very creative
Thank you Aigaga :)
is the homemade fabric die food safe to use on beeswax wraps
I don’t think you can say anything is food safe unless its been tested in a laboratory so it’d have to be down to your own judgement depending if they were for personal use or you planned to sell them. Sorry I can’t be more help :)
[…] DIY White Vinegar & Glycerin Paint Medium […]
Amazing! You are a lifesaver!!
So pleased you found our tutorial helpful Raina :)
We made the fabric paints using the bottles of acrylic paint from the craft store. I am wondering if we should have used the tubes because the paint curdled when we added our medium. Even after shaking vigorously, there was still sediment in the jar. Are the two types of acrylic paints different?
I’m sorry Cindy I’ve no idea why it curdled, we’ve used lots of different brands of acrylic paint and never had a problem
love your idea of fabric paint. As Im reading the ingredients, is the textile paint the acrylic paint that you purchase in a hardward store?
Do you think your paint can be used over a stencil as a rub or something like that? Will it need to be thicker?
Do you store left over paint in jars?
Hi Sylvia The acrylic paint is the sort you buy in any art or craft store. I make my mix up pretty thin to stamp it but haven’t tried using it with a stencil. If I did I’d probably leave it a little thicker and try applying it with a sponge. I’d definitely recommend testing it before trying it on something important. The made up paint mix should be fine kept in jars for a couple of weeks although I only tend to mix it up in small amounts. The textile medium mix should last for a few months in a jar with the lid on. Would love to hear how the stencilling goes if you do try it :)
Just wow! I am impressed! You are amazing!
Thank you so much for your kind words Tammie
This is a great idea! Please may I ask what is the ratio of diy fabric medium to acrylic paint e.g 1:5 etc.
Hi Ryan. I’ve never actually measured it as I go by the consistency of the mixture aiming for an ink consistency so the dye doesn’t just sit on top of the fabric. I’d guess that 1:5 would be a good starting point and you can always add more if you need too. Hope that helps :)
I used this fabric medium on paint for my shoes and I’m proud to say it worked perfectly! It kept the flyknit material soft and flexible and My friends think it looks fire.
That’s brilliant Ryan, thank you so much for taking the time to let me know :)
Awesome
Thanks Bea :)
what a stellar job you do nurturing creativity! your responses are so encouraging. My question: i’m planning on painting onto curtains and don’t plan to wash them afterwards. Do u think this is likely to encourage holes – ie would the combo recipe be acidic, etching into the fabric in time?
Thank you for your kind comment Sage, and such an interesting question. I am planning to print curtains myself using this method at some point and it has never occurred to me that the vinegar could damage the fabric. My gut feeling is that it wont. I think vinegar is too weak an acid to damage a fabric such as cotton, particularly since you are diluting it further by mixing it with the other ingredients. In short, I cant make any promises but I plan to try it on relatively inexpensive plain fabric myself although I wouldn’t be painting it onto cherished antique fabrics! Hope that helps!
Hi sounds great I just got home from a trip to india and I have brought back a few wood fabric stamps. :) :)
I wanted to know how much paint you mix in to the diy fabric medium you used above.
What a lovely place to visit Shana. I’d start with adding about 10% of the homemade medium. You want your paint quite thin – you can see how it has soaked into the sponge in the photos. You are almost making an ink consistency so it prints cleanly :)
Can I paint with this same recipe and leave it little thicker?
It sounds like it’s more of a dye consistency, and has to be blotted with a sponge or stamped with a sponge stamp?
Sorry. I’m kinda slow craftwise.
Hi Lora. I think you could leave it a little thicker so you could paint with it although that might mean that it would sit on the surface of the fabric more. My approach would be give it a go on something you don’t care about too much like an old T-shirt and see what happens :)
I did it again haha forgot to mention i did heat set them eventually….tea towl and the iron on medium heat…no steam of course ironed them for about 5min each….they seem fine at the moment but they havnt had much wear as I havnt been using them till frames are done but have brushed my hands over them and they dont mark half as bad…
It’s so interesting to hear that ironing them seems to have stopped the marking – I am curious to see what happens once they are in full use (although with the amount of work gone into them I wouldn’t let anyone sit on them lol!)
Hahaha so true! I can see it now..No no no dont sit there..lets sit in the lounge or outside its a lovely brisk 10° out today…
They’re finished and sitting round my big solid Jarrah table. Only one problem now..I keep looking at the table and thinking hmm what can I do to that but I cant! All these years on Jarrah is so expensive..if only Id known 3 decades ago when we not only built our home and furniture with it but burnt it in the stove and pot belly fire in the lounge. Oh well thats life
Hi Sarah Kaz again…yep i brushed with the nap of the fabric. .so that was all good. The fabric remained exactly the same…nice and soft and yes I let the lot dry for at least a week haha to be honest I was over it all by then. Failed to mention that my home made black chalk paint went on beautifully. That wasnt the problem
No prep was my problem. All the hype about Chalk paint and no preparation is a load of……!
Kicking myself as i should of known better but got sucked into the whole just paint it on fad. It scratched off if I even looked at it hahaha aggghhh what the hell! So put the finished cushions aside and got stuck into the chair frames again. Took them right back to near on original wood and after washing them down and drying I got stuck back in again
So theyre back together again..Ive stencilled a mandala on the back rest and tomorow…finally some warm weather..im distressing them a lil and sealing them with a water based poly….finally! I.ll snap off a couple of pics and let u see how they look. Thanks again
Thanks so much for the update Kaz, the chairs sound amazing and I can’t wait to see the pics :) x
Sorry sarah i forgot to mention the chair cushions are actually the old sprung wire seats covered in a proper thick apholstery fabric. A medium to darkish ocean blue..ive painted them a lovely Veridian/Turquoise and the frames of the chairs are Black chalk paint sorry about that…
They do sound gorgeous Kaz – I’d love to see a photo of them. Would you tag me if you share one anywhere?
Hi Sarah. Ok i finally did my dining room chairs I used regular Acrylic paint and added my own home made fabric medium using the Glycol Vinegar and Water. I knew id need more than the amounts in your recipe so i mixed up a 100ml bottle of Glycol and the Vinegar and Water accordingly.,have plenty left over by the way Took me 3 coats and im pretty pleased with the results…but haha im noticing that everytime i touch the material it marks…i brush over it with my hand and it seems to go but thats going to drive me nuts if they mark everytime someone sits on them. Do u know if this is because i havnt heat sealed the cushions yet and do i do this with the iron and can i even attempt it with the Glycol fabric medium?
Ive also done the frames in a chalk paint and am yet to seal them with a satin sealant. Im not using wax as they get a it of use and need something a bit more robust…cheers kaz
Wow Kaz, sounds like you’ve been very busy! I’ve never tried painting upholstery so I can’t speak from experience. My guess would be that the marking is something due to the fabric pile rather than needing heat setting. Did you add all the paint with the brush strokes going in one direction? eg back to front – maybe that’s why there’s a difference (like you see on a velour fabric for example) Personally, I wouldn’t try and heat set them unless I thought the paint wasn’t colourfast. I’d wait until I was sure they were dry and then try rubbing a hard-to-see area with a white damp cloth and see if any of the colour came off. If it didn’t I’d leave be. Can I ask does the fabric feel very different now you’ve painted it? I’ve ironed t-shirts that I’ve used this mix of fabric paint on so the glycol is fine – I’d say it would depend more on if your upholstery fabric can take it and I’d protect the fabric and iron but using an old tea towel to iron through if I was going to iron them.
I am planning on dying some upholstery. Does the color bleed after dry? . It will not be washed. Will it be soft? Thank you.
Hi Melinda. The colour didn’t bleed on the cotton and stayed soft BUT I cant say how it will behave on a heavier upholstery fabric particularly covering a large area. All I can suggest is you test it out on something similar first – as I would hate for you to trash a sofa (or similar) on my say so! I’m also wondering how the colours would look – we’ve only printed onto white fabric so you’d need to think about the coverage you’d get if the fabric was a darker colour. Best of luck with your project!
Will your recipe work for tie dye?
I’ve never tried it Lelia but I don’t see why not – I would imagine that the thinner consistency that my recipe has would work well :)
We are going to try next week. We will let you know what happens.
The shirts stayed very soft and pliable, but when we washed them, they faded terribly. Looks like they are old and worn.
Thanks for coming back and letting me know Lelia, What a shame that they faded :(
Lelia, are you still there? Back in the 90s, I used acrylic paint to tie dye shirts after realizing that it was permanent, accidentally, of course. I made many shirts for family and friends. I also taught preschool, kindergarten, and first grade students to make their own tie dyed shirts. Using the two ounce bottles, add a bit of water to the consistency of cream. If it’s too thick, it won’t absorb, too thin, colors are too diluted. To remedy either, add more water or more paint. T shirts should be laundered,rinsed well, and be slightly damp. Fold, rubber band twist shirt as desired. Yes, even four year olds can do this on their own. Apply paint, squeezing fabric to make sure the paint is spreadin, turn it over to check. I always made sure all fabric was painted, as there is a slight texture difference. You do not want the fabric to be soggy. The drying is the crucial part, you must be active and attentive. I have dried in the sun, under a ceiling fan, and with a hair dryer. As the water evaporates, it wicks the paint up, making the areas on top darker. This is a desired effect that I have not seen in “regular” tie dye. When it is evident, flip the shirt over and arrange it with that in mind. As the shirt becomes dryer, you can open up some more areas, do a bit of unfolding. When it is dry enough that it won’t drip or run, undo everything, lay it flat, or hang to dry. If you want to be fussy, you can place completely dry shirts in a hot dryer for 20 minutes or so. They can be worn. For the first time, I always rinsed a shirt by hand in cold water before tossing it in the washer. After that, any stains can be bleached, if necessary. A search for fabric medium brought me to this site, so here’s my advice. If I had a special tie dyed shirt, I would dilute Fabric medium with warm water, put it in a spray bottle lay the dry shirt flat and spray it,all over. This brightened up the colors, sealed them in. (A fellow teacher had ironed on color transfer crayon pictures to a large muslin fabric, but where it got wet, colors were fading. I reironed them, then sprayed with fabric medium mix and that solved the problem.)
Thanks Pam for all your helpful tips. hopefully Lelia will see them and I know other readers will find them very useful. Sarah :)
Hi, awesome post! Do you know if this is safe to use on a child’s hand to hand print on shirt? Will it wash off properly from hands?
Hi Ruby. Acrylic paint is water soluble so washes off pretty easily when wet. The handprint is a fab idea – love it!
Awesome! We (2-8yo 2-10yo kids) made this in large batches and put in spray bottles. At the beach,we used sand to make areas we didn’t want paint on cotton towels. Then we went crazy spraying away with the paint and left them to dry in the sun. We rinsed them in that salty ocean water then put them in the dryer on high heat for a long time. The kids love their beach towles!
That sounds awesome Kandy – we’re definitely trying that this summer!
This was wildly unsuccessful for me. The paint curdled immediately and is totally useless.
I’m so sorry to hear that Tara – how frustrating. I haven’t heard of anyone else having the same problem so I can only guess that it must have been an ingredient in your paint that caused it. Sorry I cant be more help!
Mine did, too — but if you keep mixing, it smoothes out.
I used food-grade glycerine, white vinegar, and heavy-body artist’s acrylic. My water is really hard here, so the minerals could also affect it.
I had great results, though! I was able to paint my kiddo’s name on his hockey jersey. (And I saved myself the pain of printing iron-ons, or the cost of getting screen printed)! Thank you!
By acrylic do you mean house paint? I got so much of it!
What ratio of solution to paint did you use?
I mean artists acrylic paint Tom. I’m not familiar with the different components of house paint but would guess that it wouldn’t work so easily as it is designed to sit on top of what it goes on and might be crusty on the fabric. We mixed 10mls white vinegar, 10mls glycerine and 20mls water in a jar and then used this to thin our paint until it was like an ink :)
I’m very impressed that you figured this out! I’m saving your fabric paint recipe!
Thank you, Martha. Do come back and let us know how you get on if you try it :)
Thank you for this recipe. Your shirt is fabulous and I can’t wait to see what you do with your, as we call it in the South, unbleached domestic bags. Thank you so very much!
Thank you Grace, and thank you for giving me the name. I had to search for them for someone in the US, and you really helped me out!
I’ve been teaching fabric painting for many years. It never occurred to me to Ink a sponge. We always patted it on with a sponge brush but your idea is much better. I tried making my own fabric paint with cheap acrylic paint by adding the textile medium. I ran out and couldn’t find any so I send the acrylic paint with water and use that.It doesn’t wash out, even if you want it to paint dries fast but it takes 10 days to cure. You can wear your shirt but shouldn’t wash it until after 10 days. It’s also very important to pre wash your shirt to remove any sizing from the manufacturer which would impede paint absorption on fabric. Also don’t use any fabric softener before painting the shirt. Thank you for your article and the sponge idea
Thanks so much for sharing your tips, Nana, and I’m glad you like our sponge tip too!
Clever! Great share and the little bags you all stamped are just darling. Thank you!
Thanks Naomi, we love the little leaf stamp :)
What is glycerine?
It’s also known as glycerol Lorie. Its a compound made from plants which is used in lots of different industries such as food manufacture and in things like cough medicines. It can be found in the baking aisle or in pharmacies :)
How pretty! I love the leaf print! Would make cute dish towels, and that’s great that it didn’t wash out.
Thanks Linda, dish towels would be great, and I’m keeping an eye open for cheap napkins or cushion covers :)
Sorry I got so carried away that I forgot to say how lovely the stamps look and I can’t wait to see what you’ve got up your sleeve ;-)
The stamp’s gorgeous isn’t it, and it has a lovely feel too :)
No ways Sarah, I’ve been trying to figure this out for such a long time. So vinegar is the secret ingredient. Oh the possibilities, thank you soooooo very much.
One visitor thought that the acrylic paint would probably work without the vinegar but I haven’t tried it yet to see. Either way it saves money buying the medium :)
The chemistry does not add up…. white vinegar (weak acid) should not have had any affect on acrylic paints, and especially on getting them to fix to cellulose fibre. A comparison test with just water added to the paint should show pretty much the same result.
It never occurred to me to do a comparison test Lynne but I will try just watered down paint next time and see if I see any difference – thanks :)
I hope you do, Sarah, to see. When we used food coloring to color Poodles we always used Vinegar.
I will definitely be checking out your techniques Leah
We always added vinegar to food coloring to dye eggs.
That’s a great tip Paulette, thanks :)
It makes total sense actually. From the time I was a child in the early 60’s, any time that we dyed clothing (which is the same as painting in a sense) we always dipped the clothing in a white vinegar solution to set the dye so it would never wash out. I never could understand how it worked, but it did, so we never questioned it.
Have to admit I don’t know the science behind it either Sussie – will add it to the list of things to look up when I get a moment :)
this is amazing, and much cheaper than buying fabric paints. Thank you for sharing! BTW, did you use white vinegar, or white wine vinegar?
I used white wine Lynn, but I am sure any would work as long as it isn’t a colour that will affect the colour of the paint :)
Looks great. I’ve washed acrylic paint before & it holds up anyway but it is hard, I’m assuming watered down it would be more pliable but not as washable, would also bleed. I take it you had none of those problems doing it this way. I’ll give it a go. thanks
No we had no problems with it bleeding, and by watering it down the paint is able to soak into the textile a little rather than just sitting on top. Next time we do it I try some paint thinned using plain old water too and see how it compares to our mixture :)
This looks wonderful! That leaf printing block is gorgeous!
Definitely something to do with my son during the summer hols. :) #BeInspired
Thanks Manny, the block is wonderful isn’t it – it’s a piece of art in its own right :)
It definitely is Sarah! :) I am very jealous haha xx
My daughter would love this
Thank you for sharing this new creative idea. I plan to use this creative crafting making my own fabrics for future products!
Thanks Darlene, we would love to hear how you get on when you try it :)
I love learning new things when I come here, and this is so cool. I’m going to have to try this, I don’t have any glycerin here, I’ll have to get some. But on our side of town only one place carries the fabric medium, and I use a lot of it on the pillowcases, this would be great for when I don’t have any, or even to replace what I’m already using. You are the best!
And I love the way the leaves turned out, that is one cool stamp!!!
Be really interested to hear how you find our mixture compared to the fabric medium, Nikki – we aren’t very experienced in using fabric paint and have never tried the medium. I can imagine you get through plenty on your beautiful cushion covers :)
[…] The Craft Invaders blog has a great idea to turn regular acrylic paint into washable fabric paint using items you probably have around your house. It’s perfect to use along with large stamps for making your own custom clothing and home decor items like napkins. Find out all about it over on their blog. […]
We’re delighted to be featured on the Craft Gossip Website – thanks for having us!
What a fab idea and from your houshold cupboard. I’ve pinned this! You are always so full of awesome ideas! #bloggerclubUK
Thanks so much, Karen. I love working out how to do stuff with items we already have at home or can find :)
What a wonderful idea and one that with time eg. Christmas costume making etc will be great to refer back to. Thanks for sharing this post with #bloggerclubuk
It’s a great tip to have up your sleeve – there’s so many times we would have used a spot of fabric paint if we’d had it, and as you say especially with costumes – the kids seem to have a lot of random dressing up days at school!
Ohhhh swizzle sticks!!! I wish I had seen your fabulous post before I bought some fabric medium the other day! Great tutorial and will look forward to trying your methods out! Pinned, tweeted and stumbled :-)
Isn’t always the way after you’ve just bought something! Thanks so much for sharing x
Wow these look so good. I had no idea you could make your own fabric paint either. Will definitely need to try this out with Agent M.
Thanks for sharing on #BloggingClubUK
Let me know how you get on if you try it, Sarah-Jane – it means you can mix any colour you want :)
What a beautiful idea Sarah. Your choice of stamp was perfect. And the vinegar certainly makes all the difference. Pinning for future use.
Was so pleased when I saw the stamp in the pile, Mary. ! am delighted with it – I think you could just hang the stamp on the wall as a piece of art in its own right, it’s so lovely :)
Love the leaf prints! Looks like a fun projects. I am going to have to try this paint mixture sometime.
Let me know how you get on if you do, Linda – everything is getting stamped here atm :)
Wow I am really impressed, I am not artistic or crafty in the least so wouldn’t even think of doing something like this. They look wonderful, I’m glad you found something that worked! #BloggerClubUK
Thank you, Ellen. I love to find simple and cheap ways of doing things if I can :)
I absolutely love these leaf prints! So so gorgeous! they’d look awesome on pillows, table runners or totes! And how cool that the paint is home made!
It is a beautiful stamp, Katrin – I’m totally in love with it :)
These are so beautiful and I love how organic it looks.
Thanks Celeste, it really is a beautiful stamp, and lovely to use :)
This is awesome and I’m amazed it worked. Now I can’t wait to try it. Pinning to share!
I was delighted when I pulled it out of the washing machine, Laurie! Thanks for pinning x
This is such a great craft project. I love that you made your own fabric paint with acrylic paint, glycerin and vinegar. I will be saving this paint recipe and can’t wait to give this a try. It looks really beautiful!
Thank you, Ilka. I had been planing to buy some fabric paint so am really pleased this worked – Acrylics give you so many colour options :)
Love this idea. I reckon I’ll try it – I’ve got a few blank bags
Be perfect on bags – I keep walking around looking for blank things to stamp!
Great idea! Pinned! :)
Thanks Erin, let me know how you get on if you try it :)